Building a plant table: (3/3) putting it together
Well, this draft has been sitting unpublished for a while, but it’s time for the third part of my ad-hoc build series.
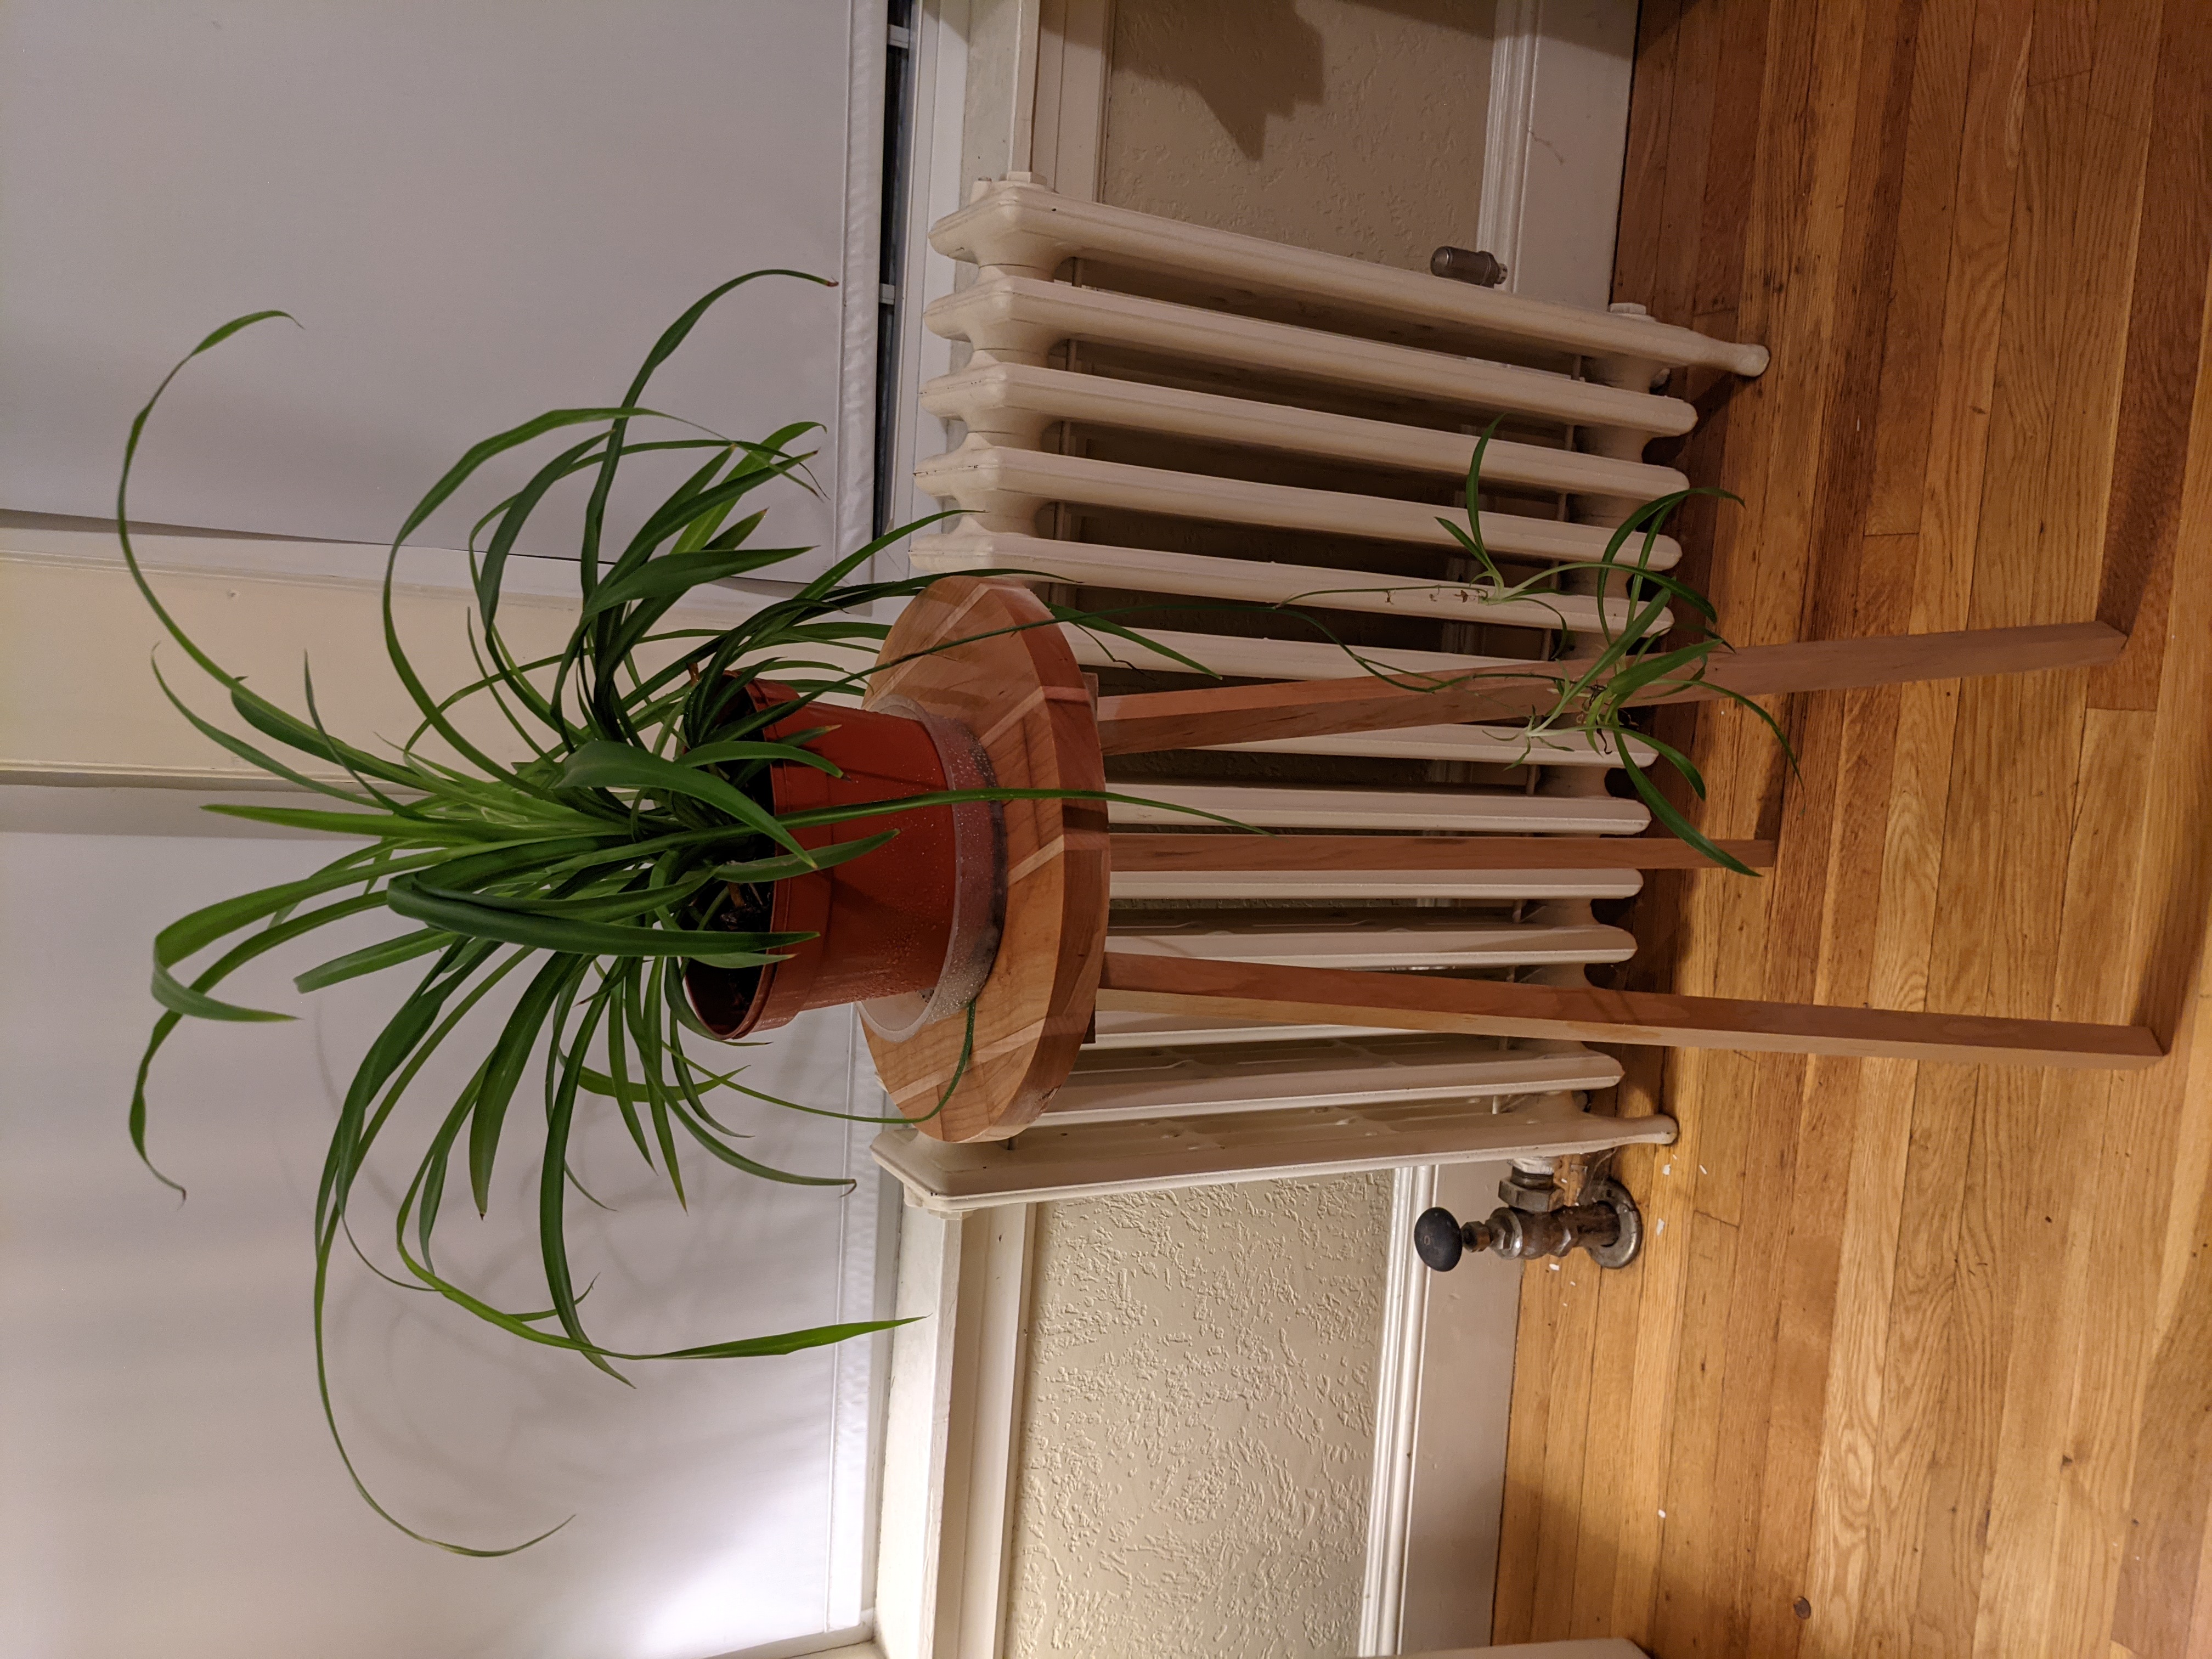
With the two pre-requisite jigs out of the way (1 2) here’s the main project. Essentially with winter arriving I had some typically outdoor plants which needed to be moved back inside to avoid the frost. My current home has reasonably high windows and narrow windowsills, so some sort of table was needed for my plants to get a reasonable amount of sunlight.
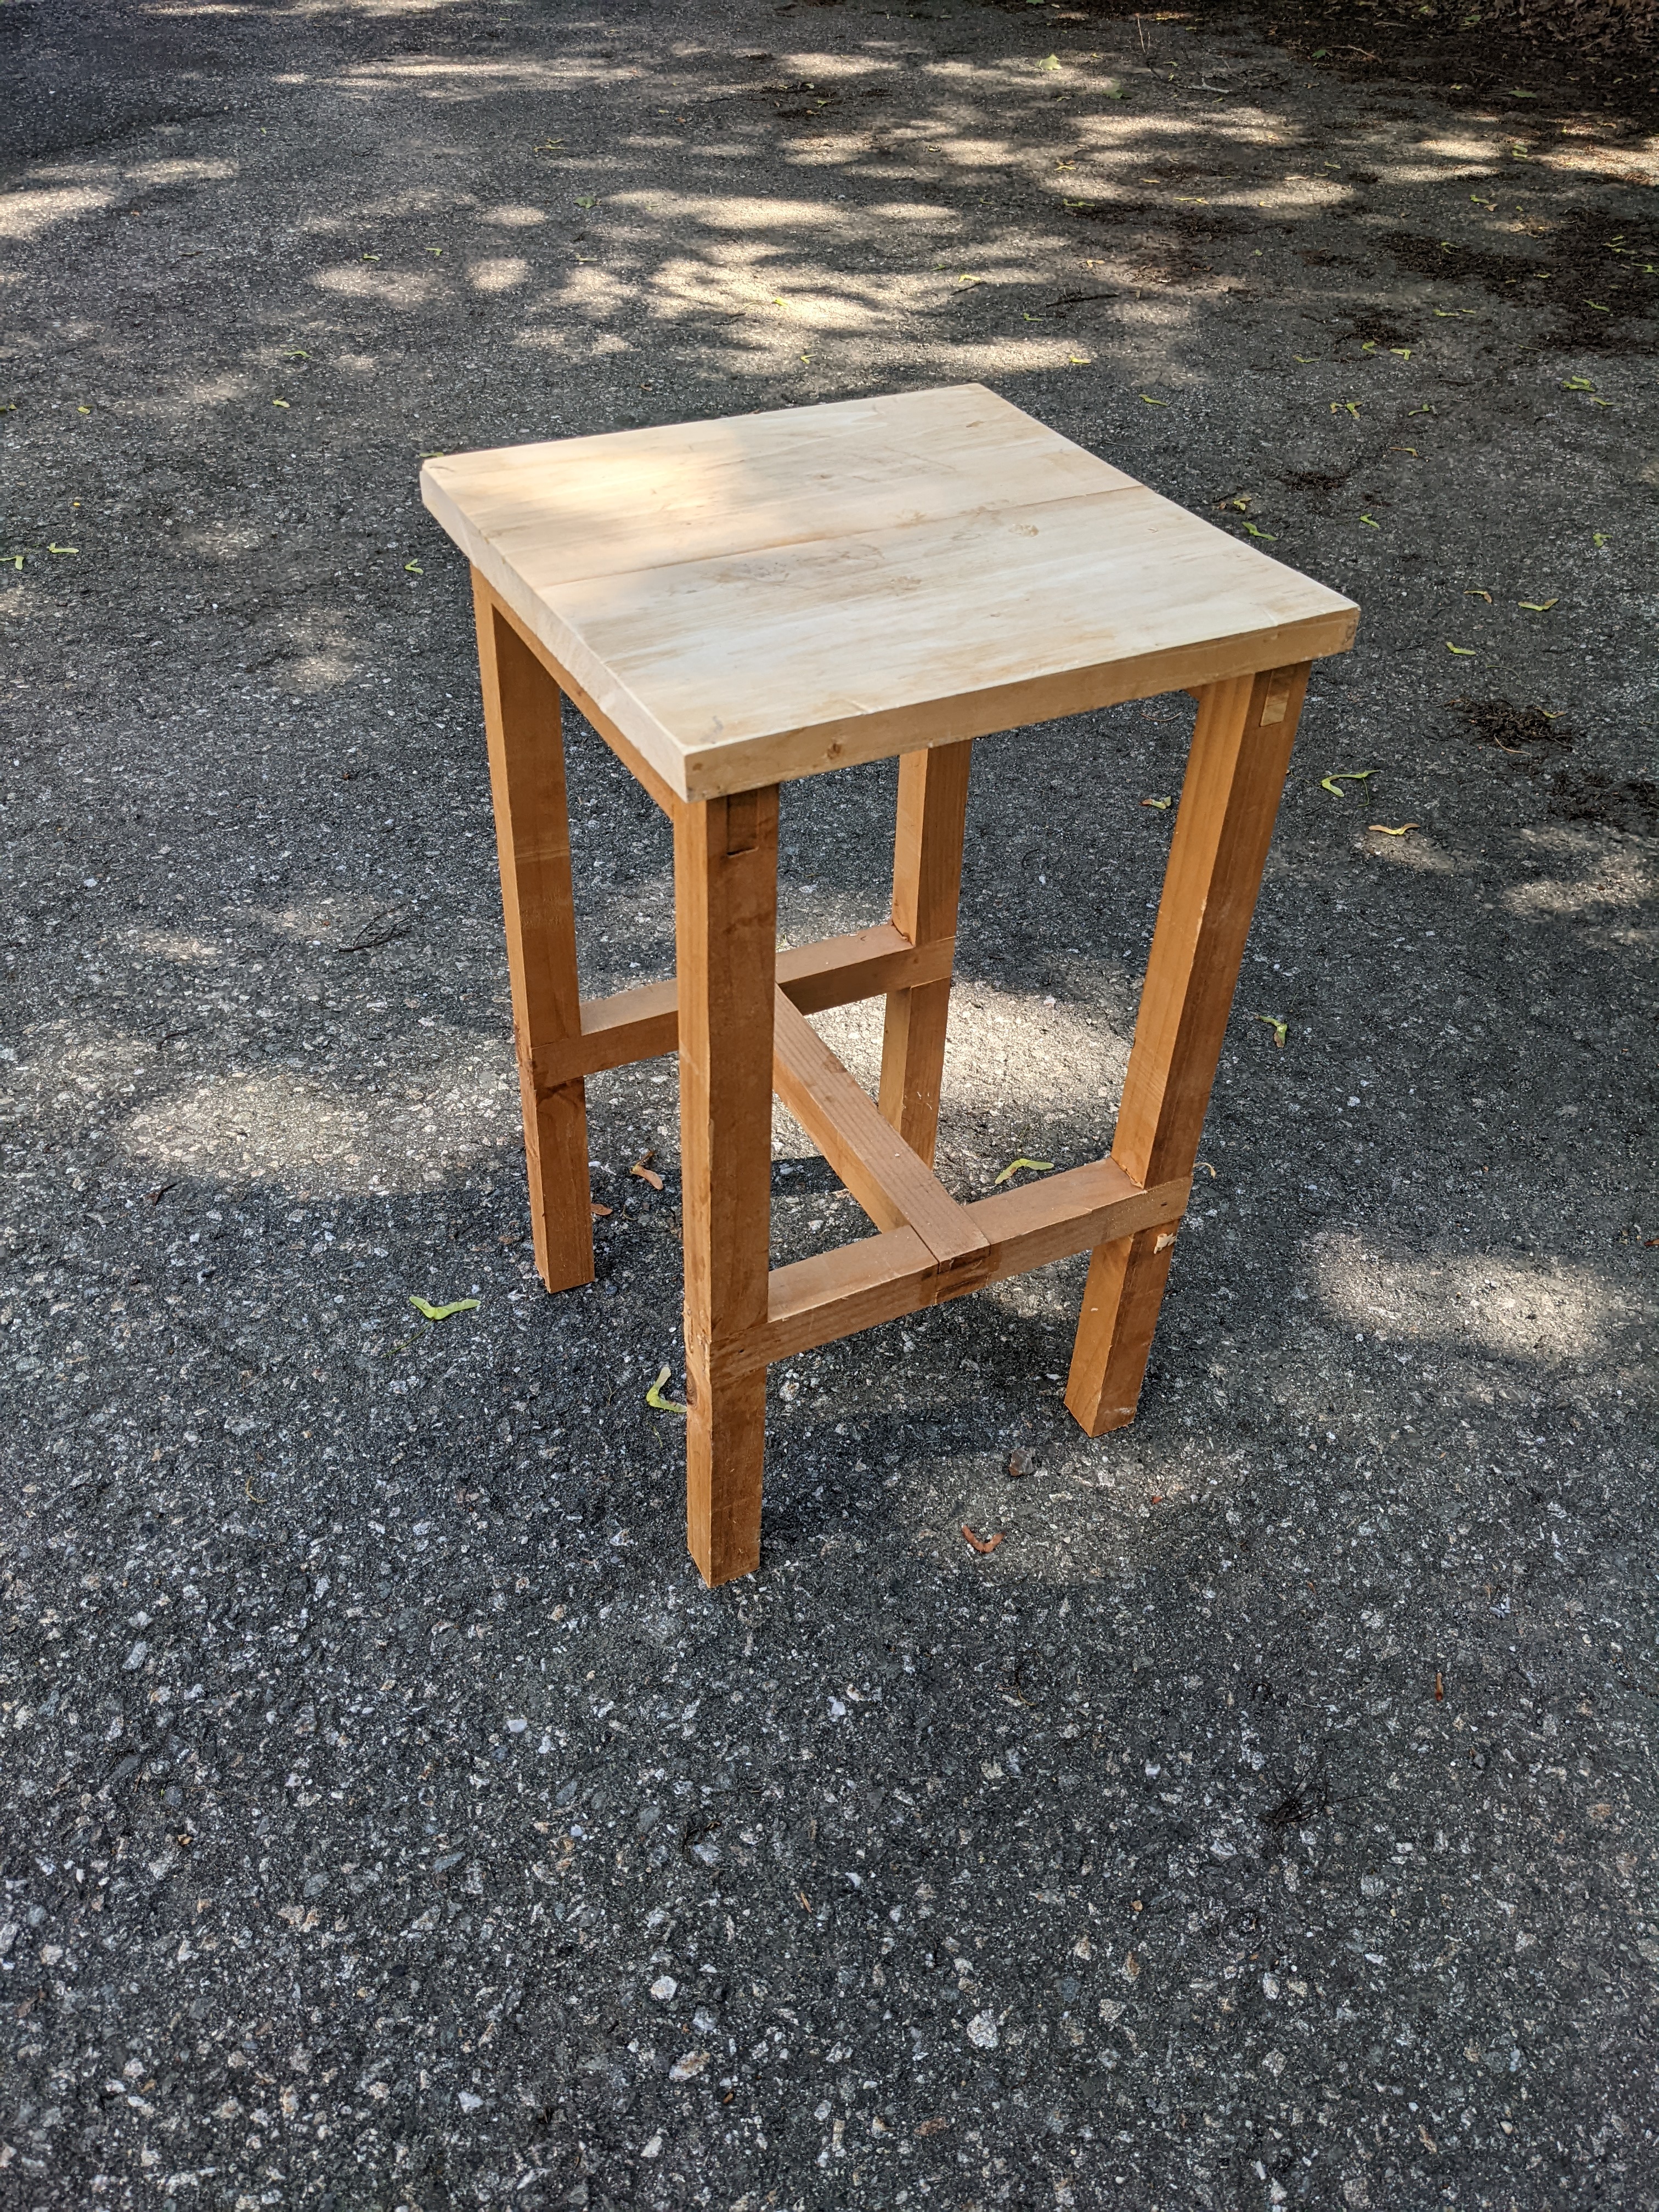
I started out with a simple stool that I had built with pine reclaimed from an old door. If you’ve got a landlord who takes a door off the hinges and tells you to get rid of it, what else are you going to do, eh?
So, while my stool does not look all that nice, it did give an initial sense of scale and provided a baseline for what felt right. Starting out, it was too short, stout, and generally too blocky. So at a high level whatever I prototyped would end up being a slimmed down tall stool. To make the profile leaner, the top would end up being circular, the legs thinner, and only three legs would get used. Placing the legs at an angle would help with the outline of the design, though it would complicate the joinery somewhat. Having linkages from legs to all of their neighbors would be possible, but it would be more complex to do as well as not being all that visually interesting. So to stabilize the table all three would be joined to the top and joined together at some point lower down in the frame
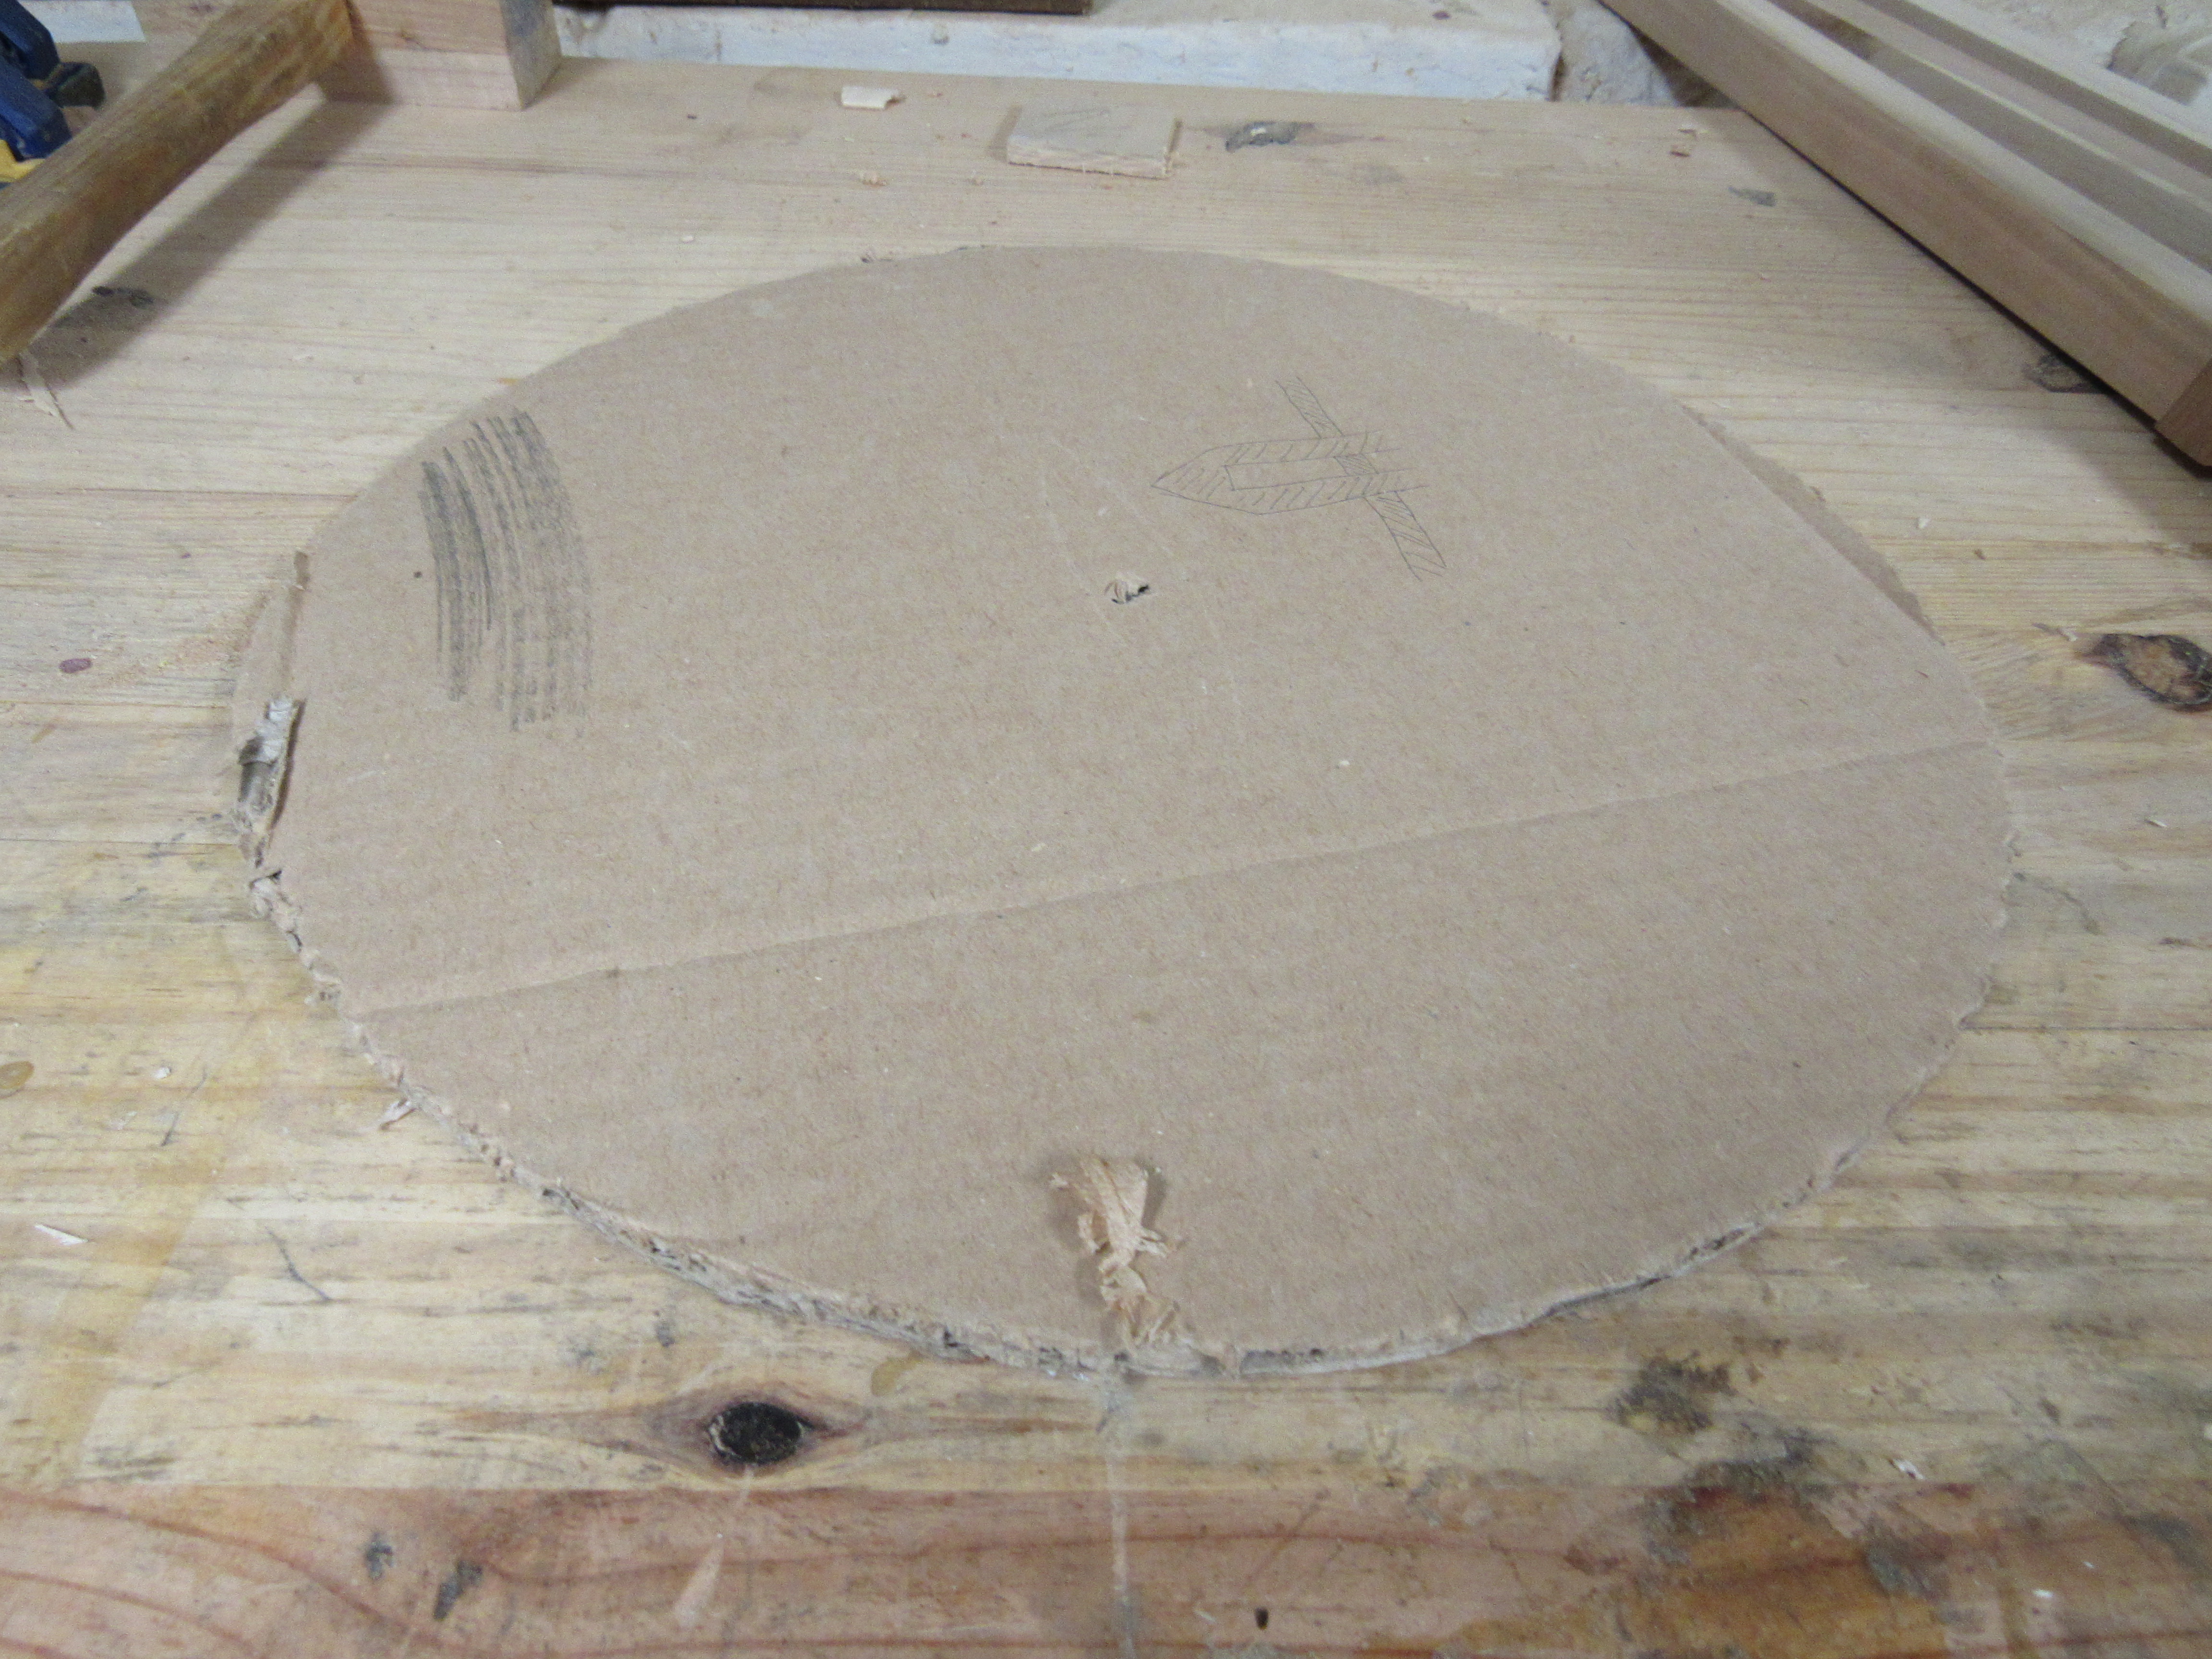
With the general plan in mind it was a matter of estimating what sizes felt right and rectifying that with what stock was available. While I had plants which certainly could use a better perch, using up old material and `scrap' was a primary project goal. Starting out with the table top it was a matter of placing a plant down on a sheet of cardboard, roughly tracing the desired outline relative to one of the objects it was going to hold. From there without any measurement a set of dividers could be used as a compass to get an accurate circle which could be cut out.
The height of the table was initially measured by done by walking over to a window, eyeballing where it feels like the plants should be and then just placing a hand on my side at that height. While a smarter person would have simply measured the distance directly the destination of the tables wasn’t in the same room as the tools themselves. So, some measurement error may have accumulated, but that just adds to the character of the process.
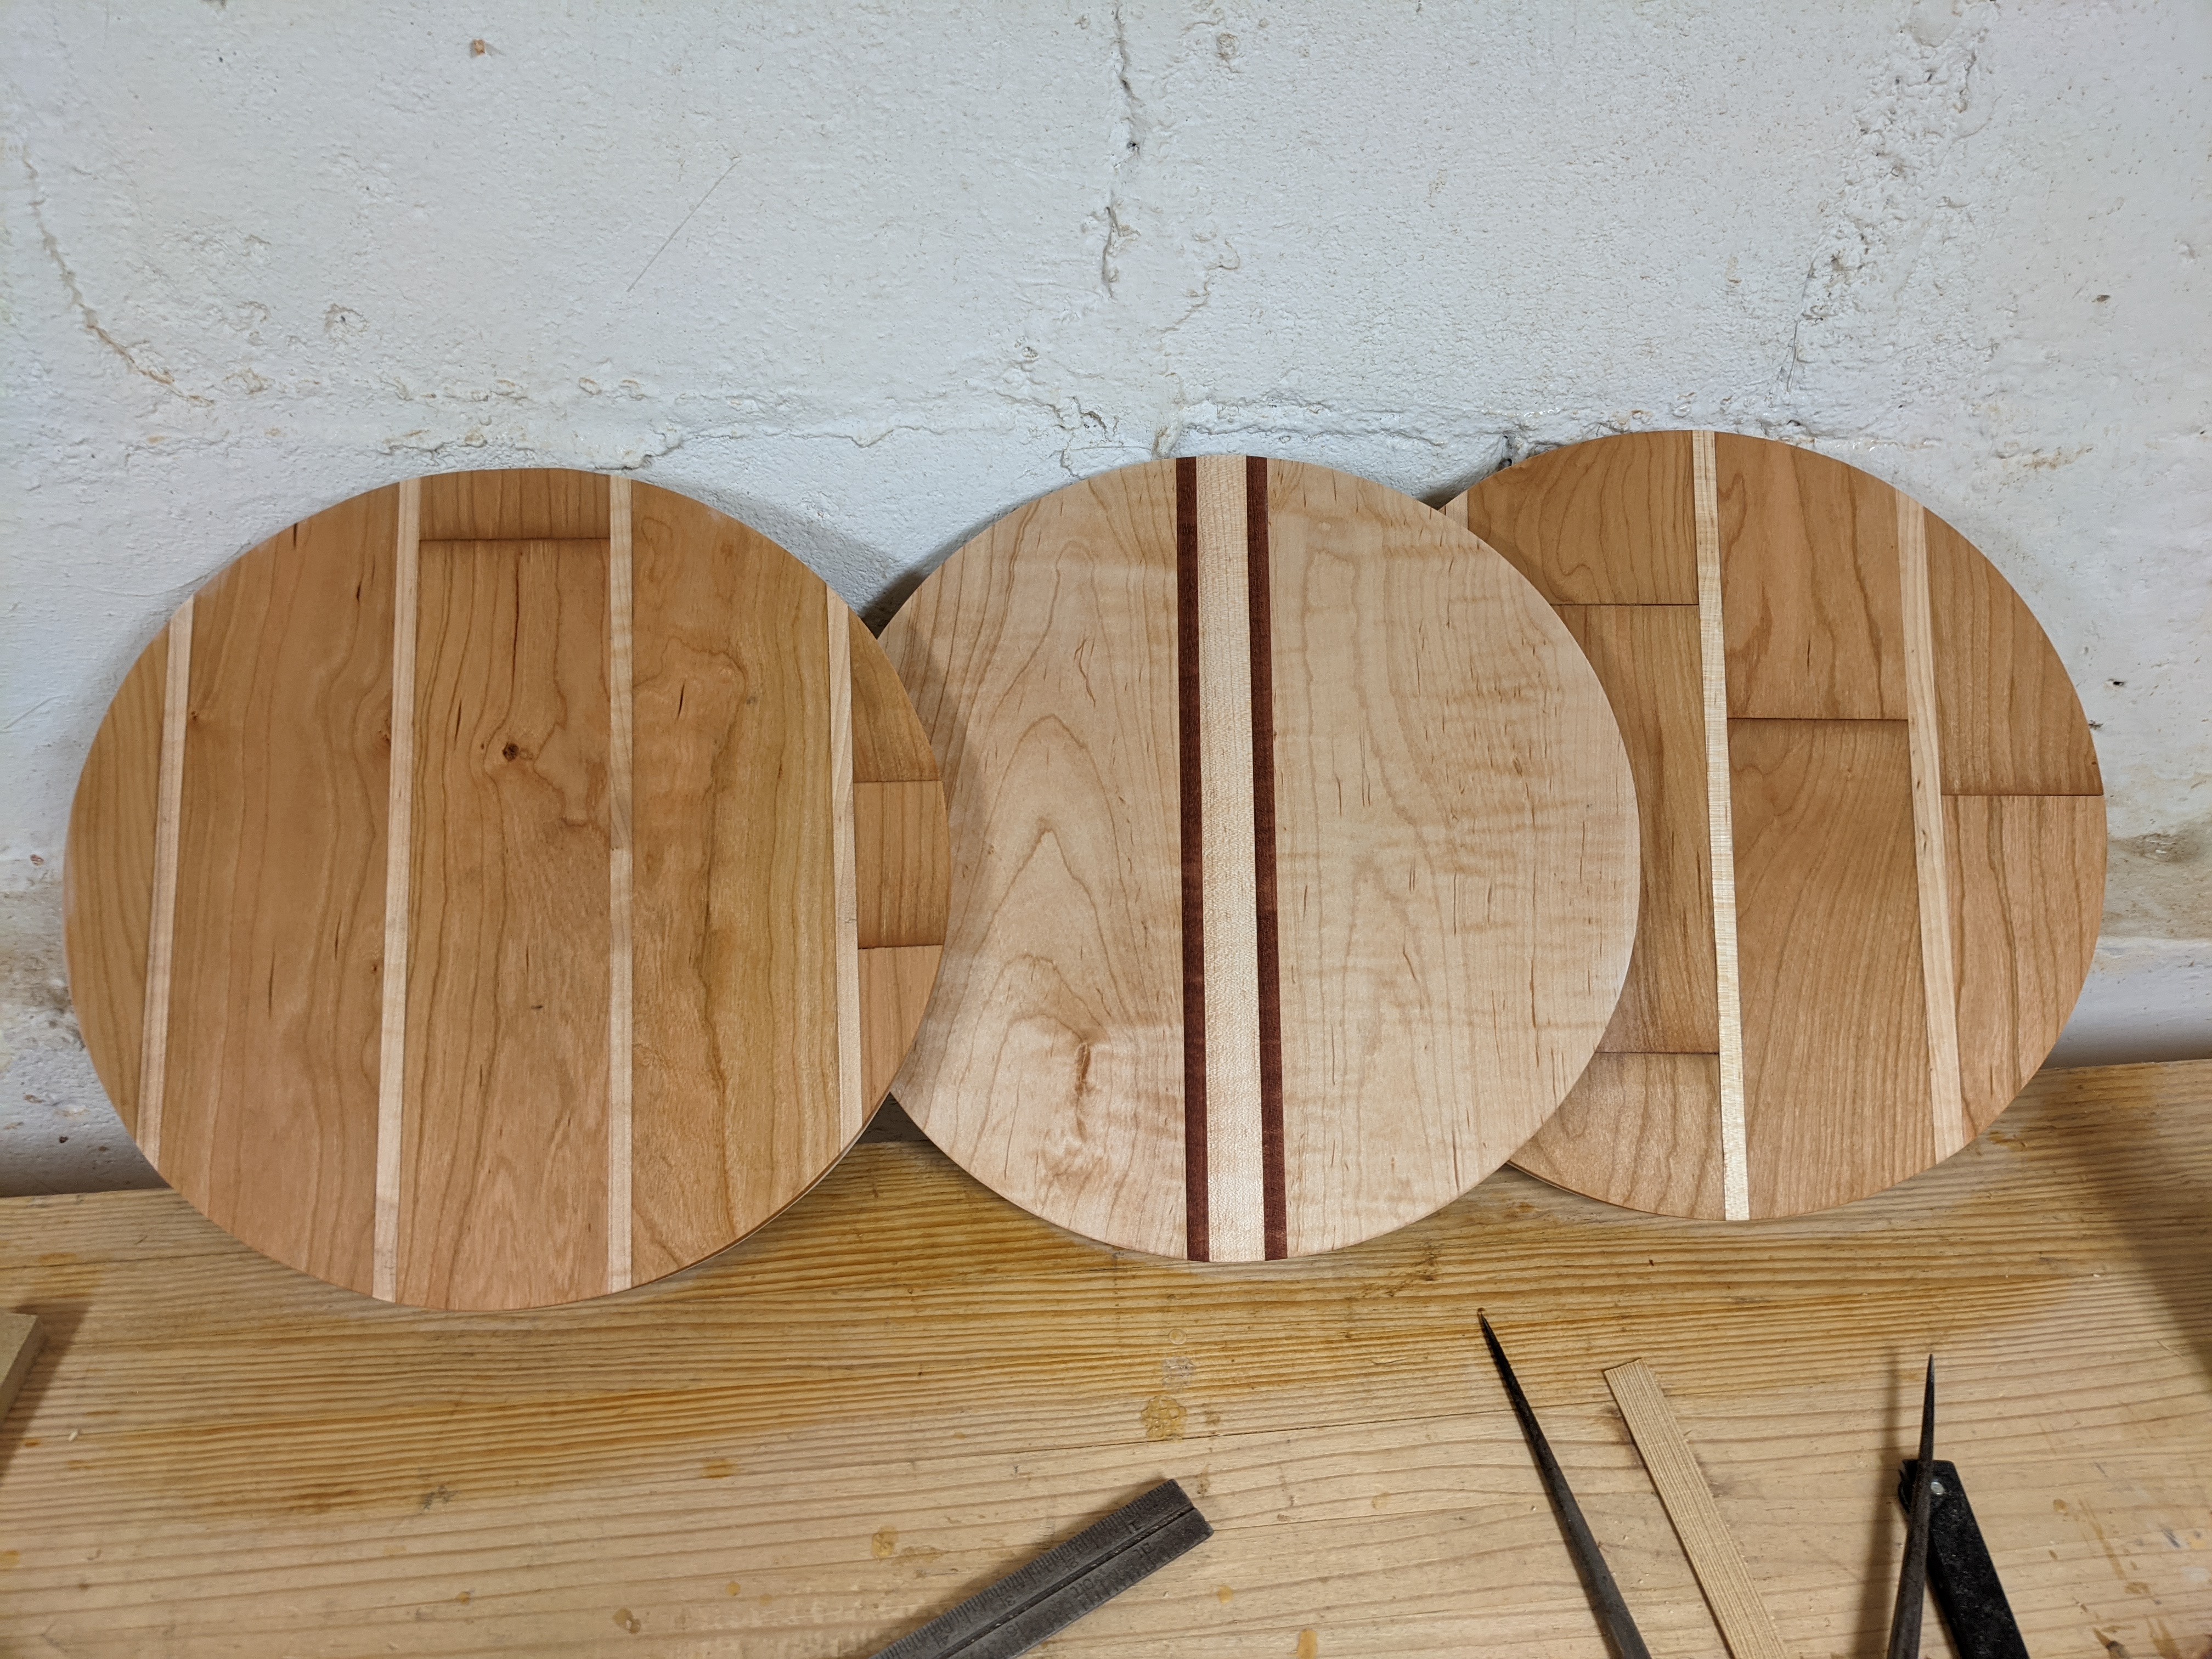
As per the leg and top thickness, that was purely a constraint of what was easily on hand without milling fresh boards, creating additional scrap. Initially the plan was to make only one table, but hey who makes a project without some scope creep. The first part built out was the table tops. Each top is built out of a collection of scrap pieces which admittedly didn’t fit together all that well. As such, it was a concern that some of the tops would well, come out horribly? So far though, the low precision of a bandsaw & handtool combination has held together well with standard wood glue.
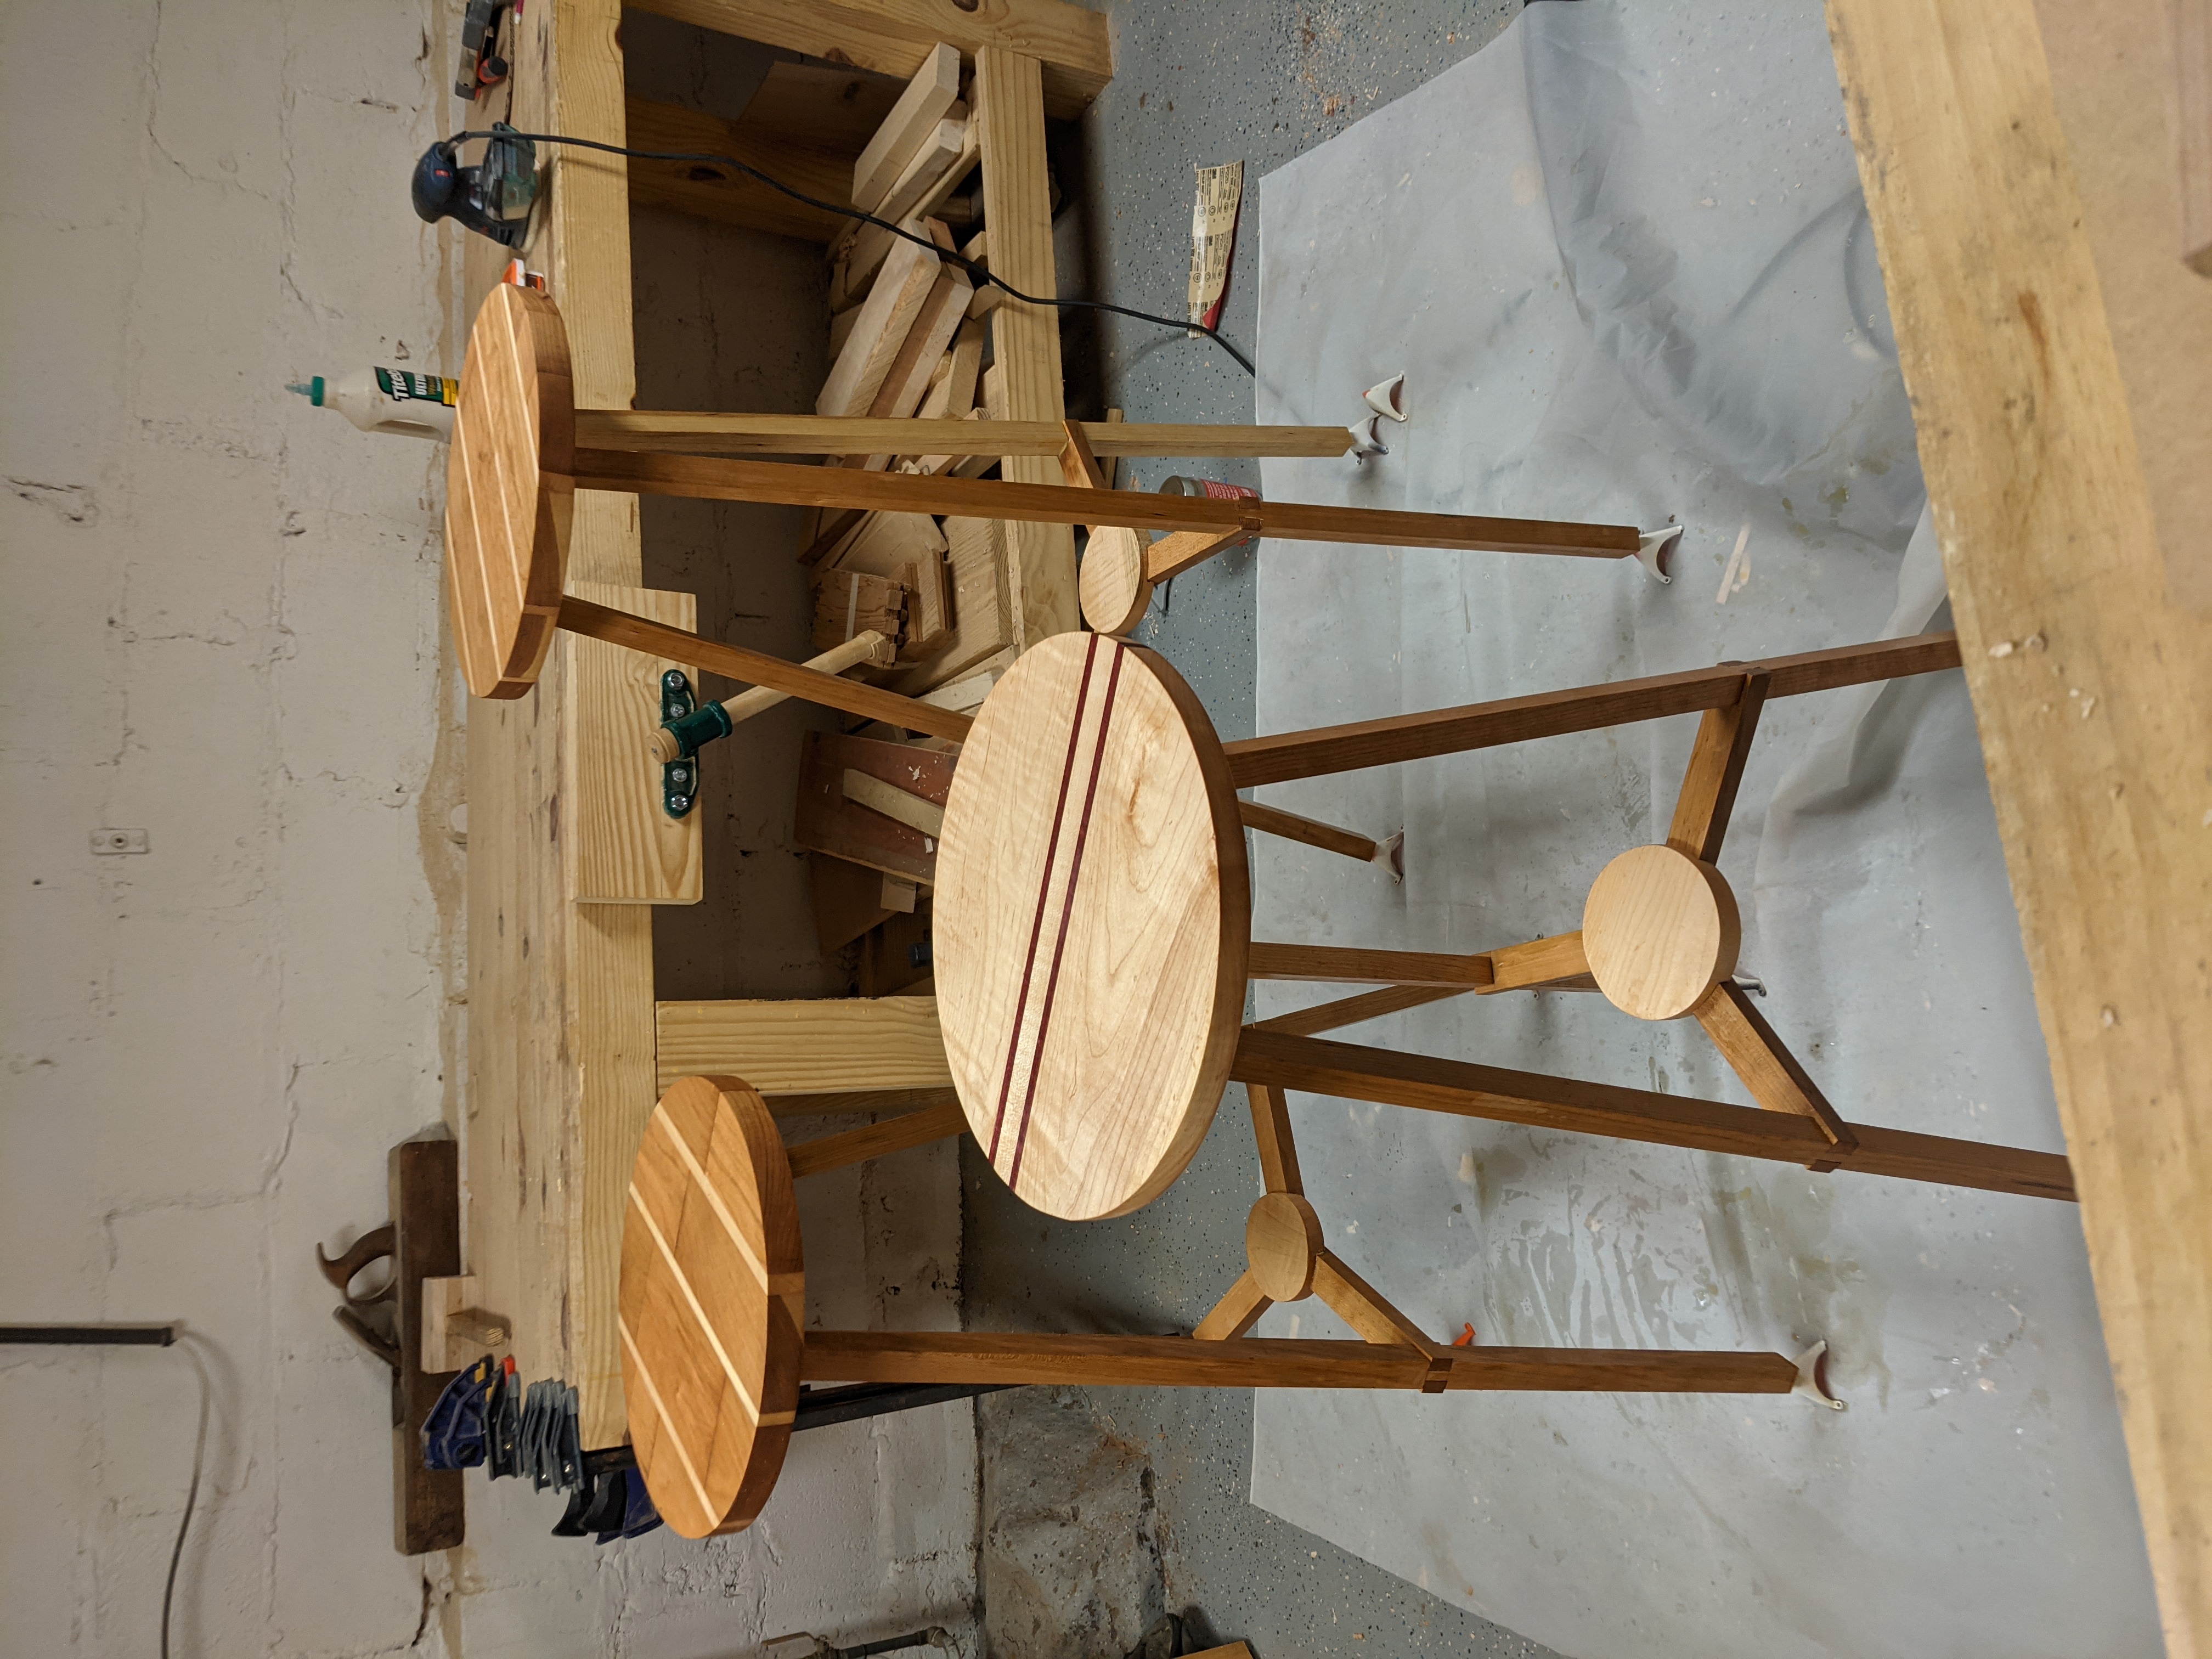
I ended up making three tops with one on the thin side and two chunkier tops. As they all turned out reasonably, so three tables it was. When it came to the legs there was a similar split of enough stock for three thin legs and six slightly thicker ones. The thin stock was slightly shorter as well, so to have a set of unique tables each one started out at a different height.

The build progressed fairly quickly from there. The above template was used to locate the top mortises, then the lowers were added about 2/3rds of the way down. The linkages of the lowers were more cherry stock available at the same rough dimensions as the legs themselves. Once everything was together and with some light calculation the lowers were cut to length and used to align a base joining plate.
The joining plate was a disk cut out on the circle jig (link), and the lowers were manually marked on it for where they’d fit into three recesses. Not as accurate as layout out the locations ahead of time, but there was much less math involved by seeing where parts naturally aligned.
The final results were pleasing in my opinion
Now it’s not to say there weren’t any flaws. A good set of photos could hide them, but I’ll mention them anyways. You can’t advance your craft without acknowledging where you can improve.
-
The bridle joints for the lower supports have some gaps due to the stock being out of square. It’s tricky for me to resolve this issue with my current tools, but becoming more proficient at jointing stock with hand planes should reduce this problem.
-
Lower joints were connected asymmetrically. Doing all of the math for the lower lengths, and how they were slotted into the joining plate would have resolved this issue.
-
Gaps were present where the legs connected to the top. I’m not sure of the complete fix here, though I suspect that the angles were slightly off between the upper tendon wall and the base of the tendon. Either that or the tendon bases were just trimmed with my chisel too sloppily. Some better marking, chiseling, and additional glue might resolve this particular issue.
-
Gaps within the table tops were initially visible. I’m not sure how to fix this one with my current set of tools, so perhaps additional tooling like a sander with a right angle bed might help square up endgrain without creating tear out you’d expect from planes or routers.
I might eventually return to this project to make a set of plans, but for the time being I’ll leave a set of freecad sketches to anyone interested: FreeCAD model.