Building a plant table: (1/3) starting with a circle jig
For a change of pace I’m going to talk about a crafting project rather than something related to music or programming. To kick of hopefully some new retrospectives of projects, let’s begin with a three part journey into the construction of a simple custom `plant table'. This table was built a month or two back and it’s the first nice furniture project I’ve completed without plans or other inspiration that I’m satisfied with. For an idea starting out as a way to use leftovers from a previous project everything went fairly smoothly. We’ll get to the final project in the third part, but let’s start off with some jigs built along the way.
My design called for a circular top, so being able to reliably cut circles of a desired size was how I started off. With a bit of searching I could have likely found something nearly identical to the circle jig that I designed and built, but like other steps along the way I wanted to use what was on hand and what was easiest to setup giving the tooling of my own woodshop.
The basic principle behind any bandsaw circle jig is to allow for the workpiece to be pivoted around a point and for that point to be positioned to be perpendicular to the leading edge of the blade. Different jigs accomplish this structure in their own ways, but the basic principle holds true.
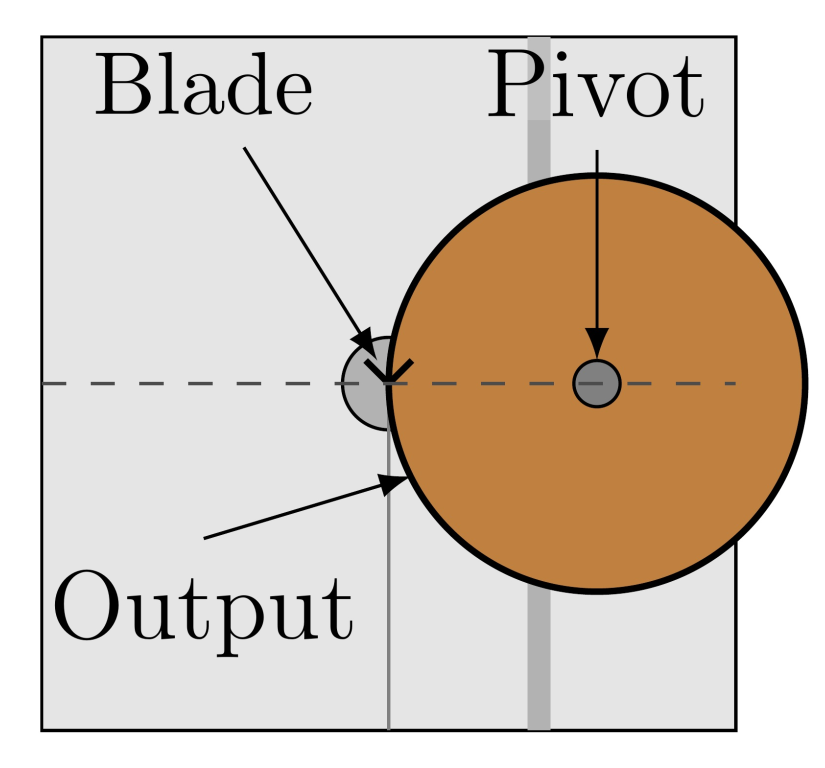
The pivot could be constructed by gluing or clamping to a rotating base or through other fixtures, but other plans I’ve seen stick to the simpler option of a partially exposed nail. The nail sticks out just enough to dig into the bottom of the workpiece and let it spin without falling off. It does leave a small mark on the base, but house guests typically don’t inspect the bottoms of tables. Another design choice is how the woodworker can use the jib to start the cut. As the miter slot is already there, I used that to both support the jig as well as to guide the workpiece when getting started. Lastly, since most of the full table project’s design was done in an ad-hoc fashion, the jig was also made to be adjustable (within reason).
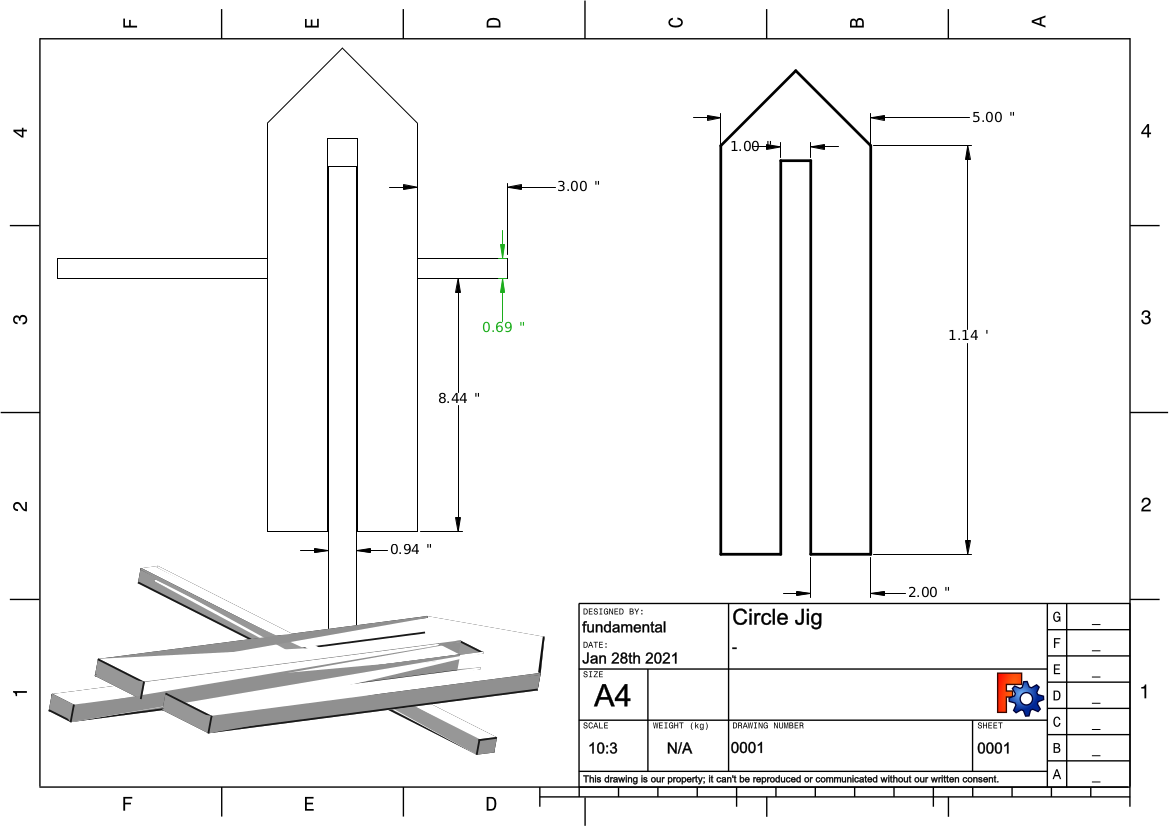
Lastly, the jig was made to I used a simple mdf construction which tapered into a point to allow for easy alignment of the jig along the miter slot. Since most of the full table project’s design was done in an ad-hoc fashion, the jig was also made to be adjustable (within reason).
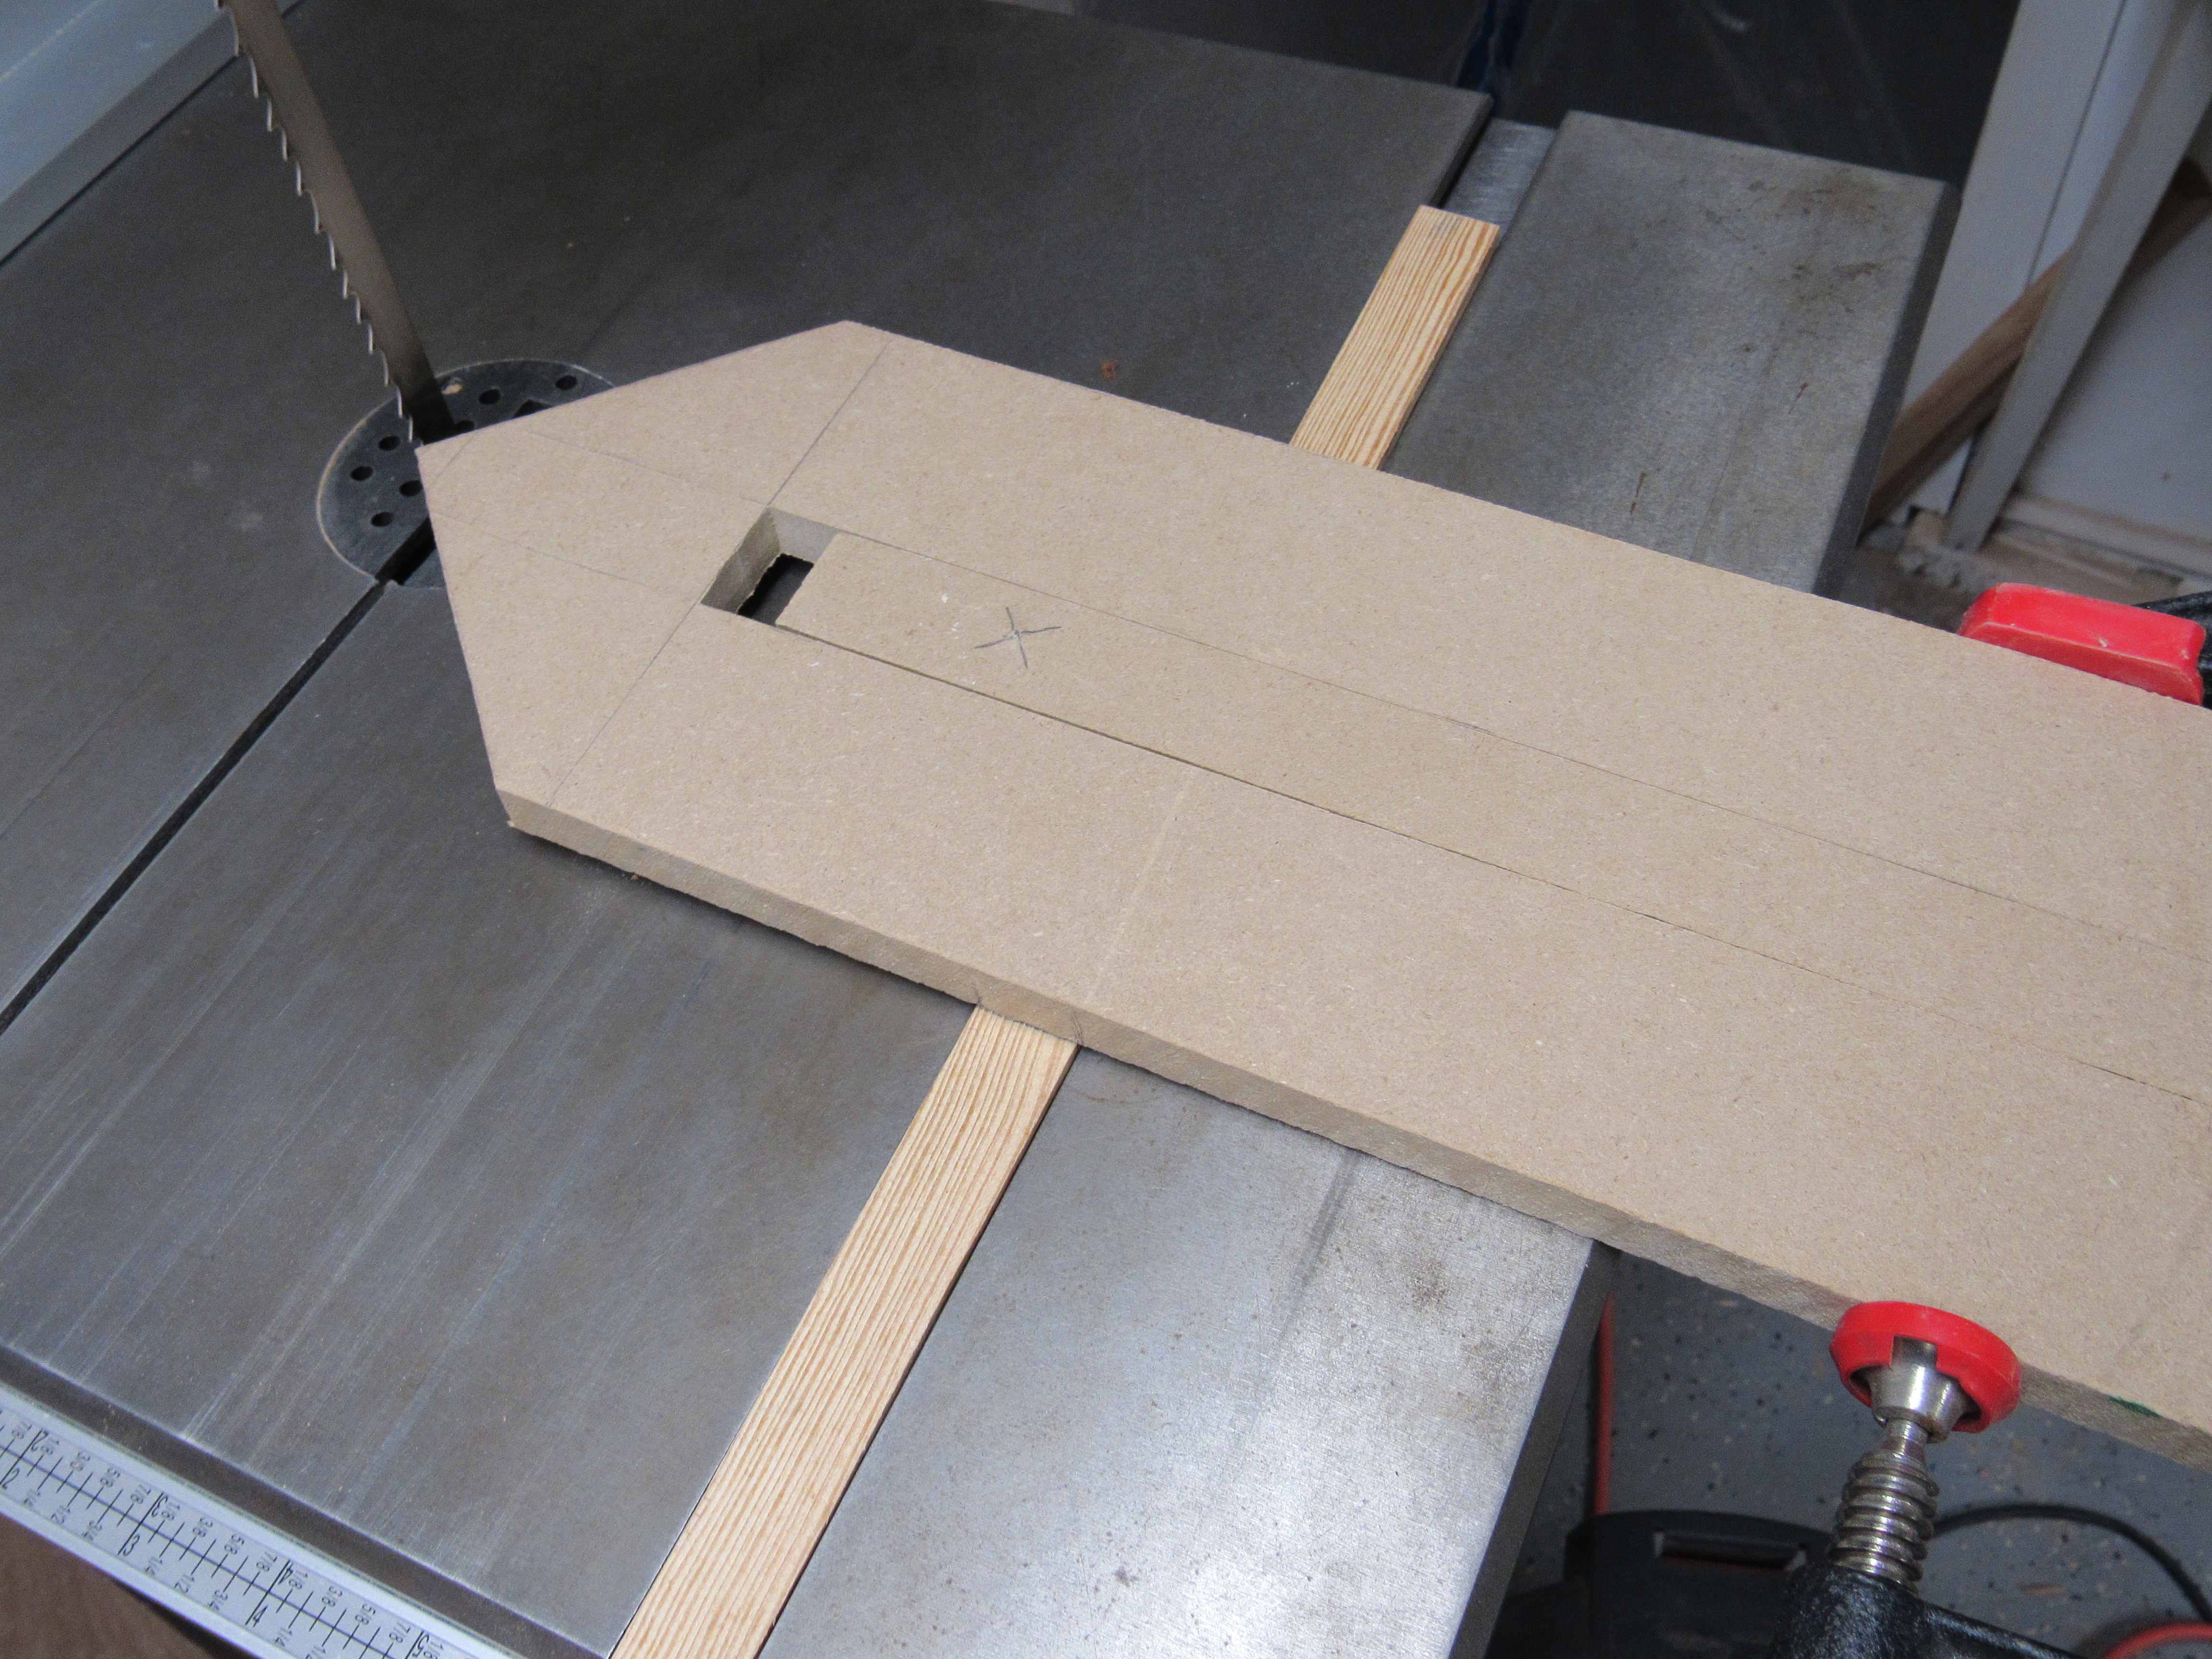
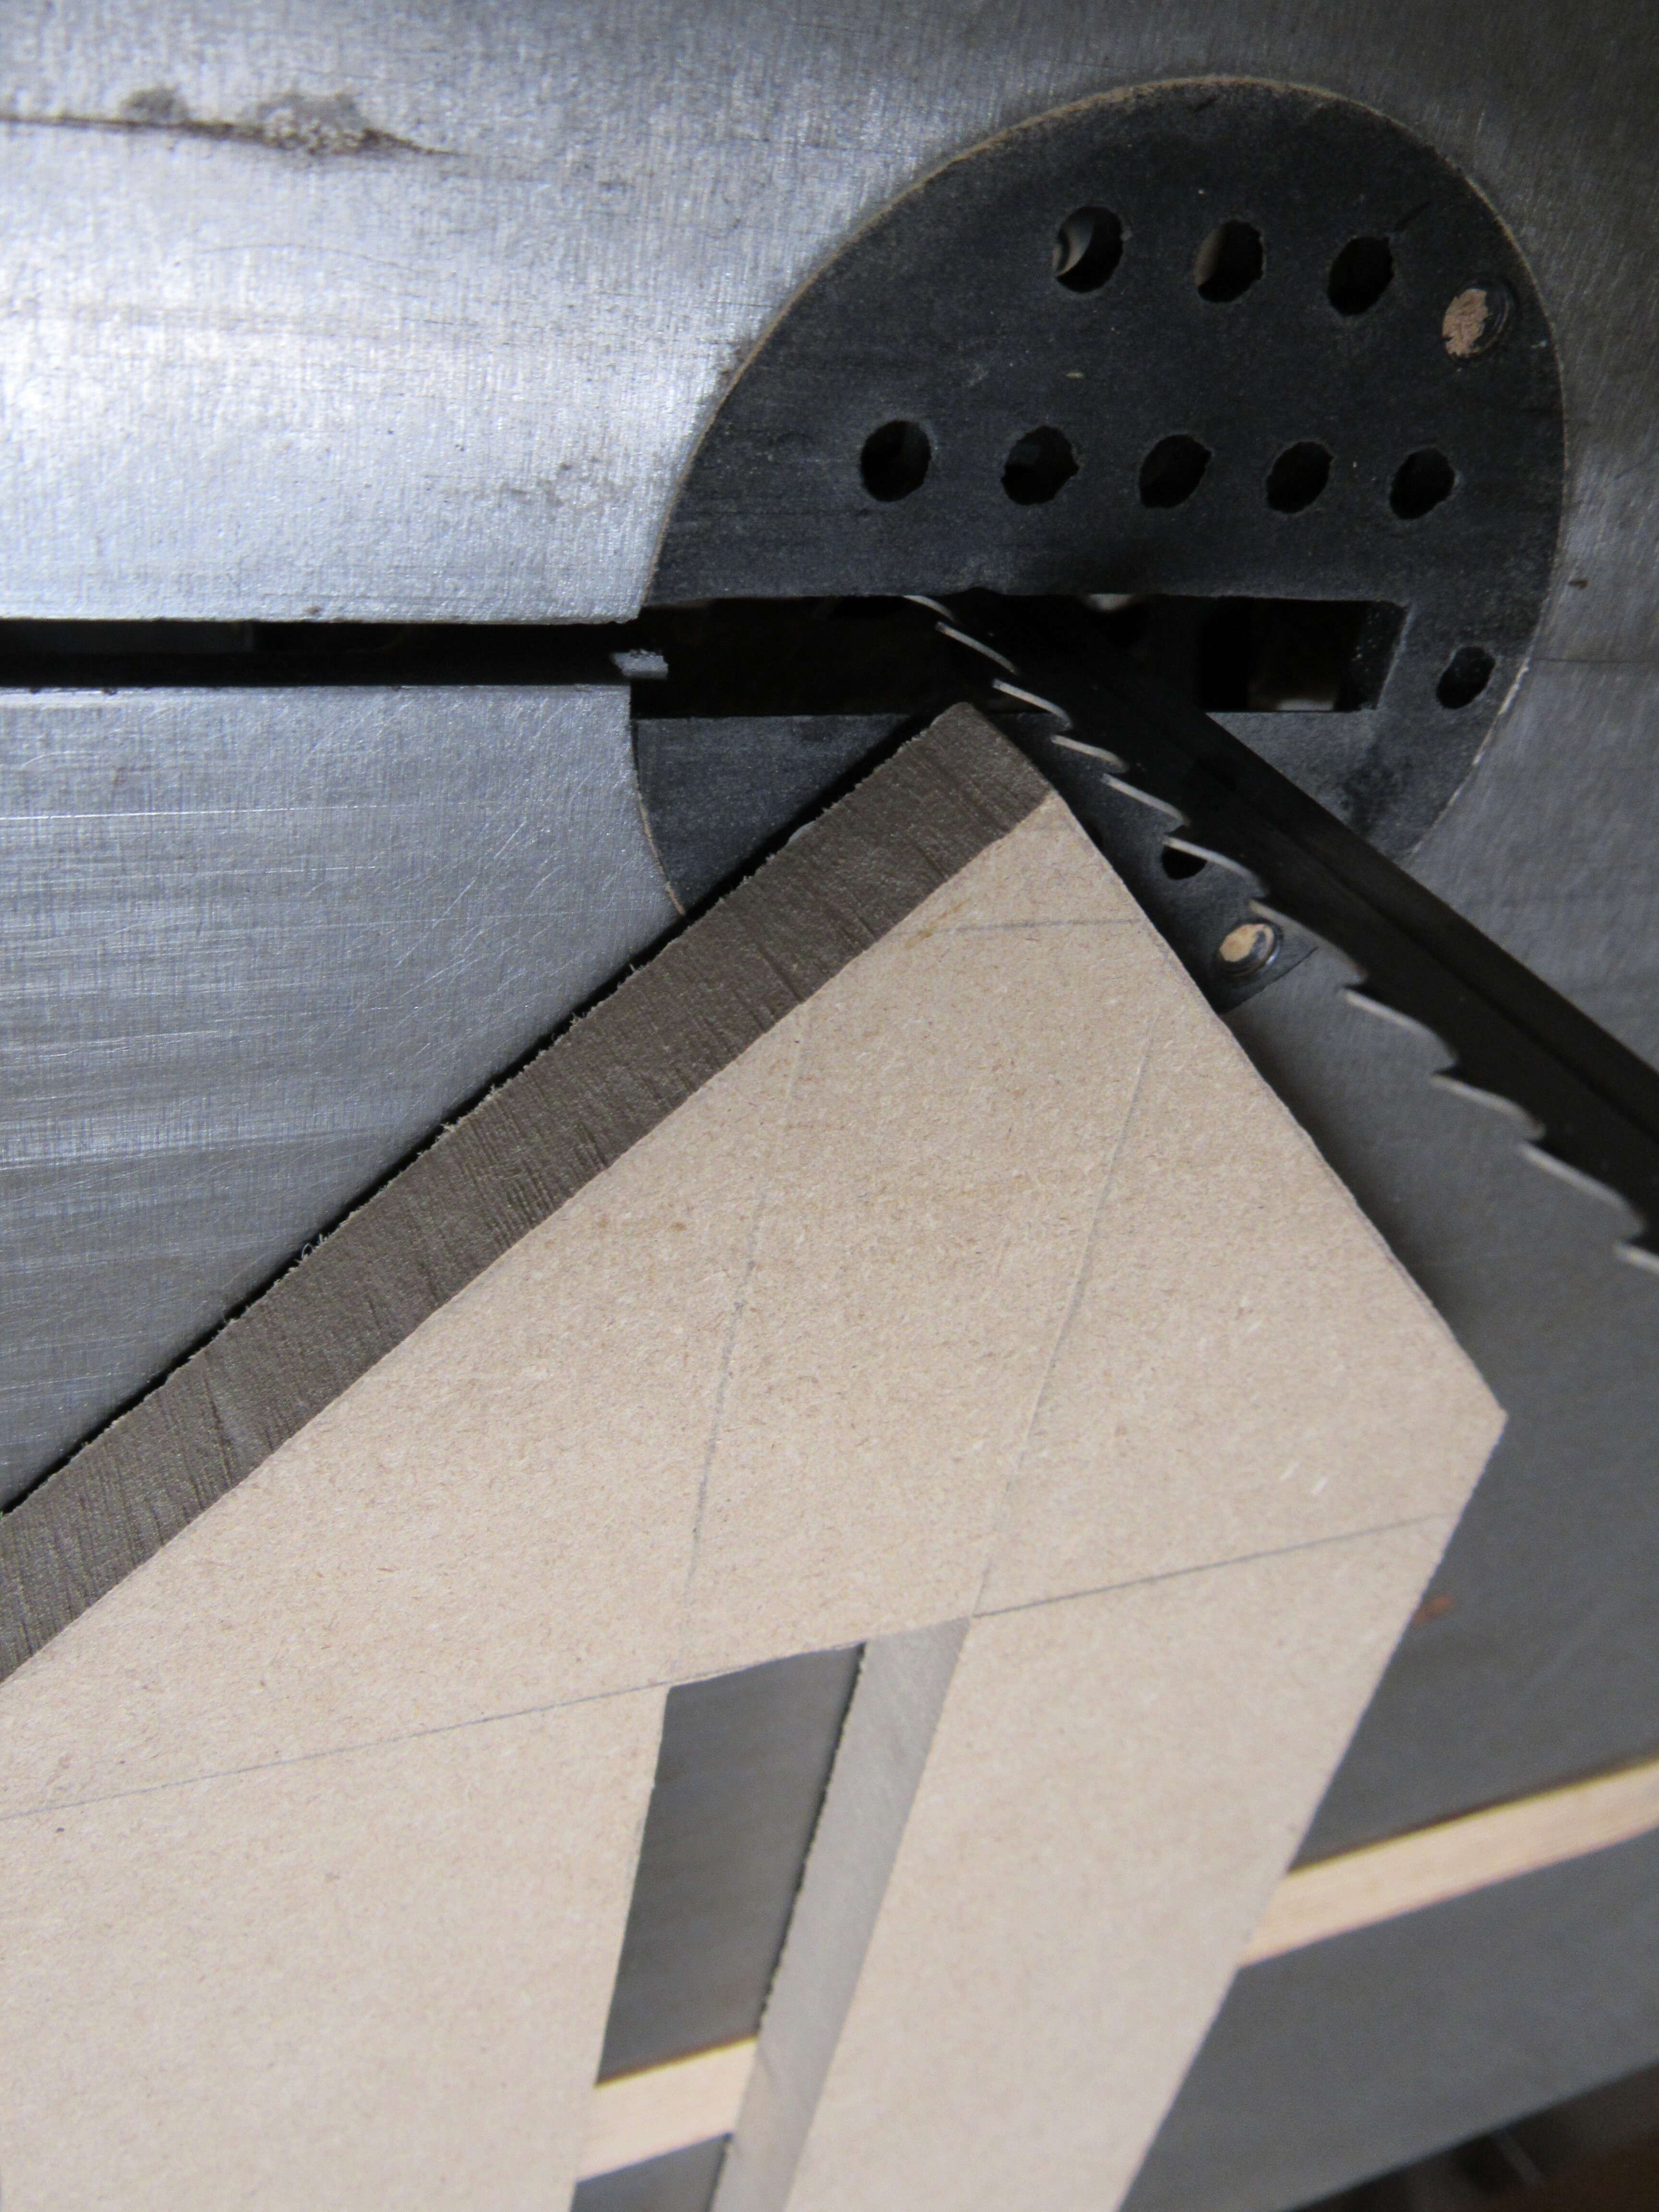
As can be seen in Fig. 3, the jig is mostly made out of some MDF. The material was extra from I had from making a previous router template ( the same project which yielded some extra cherry which is used extensively in this 3 part series). The jig has a fixed base which can travel along the miter gauge, a slide which has the nail pivot, and an optional clamp which can be used as both a handle and as way to secure the slide in place. The base of the jig has a pointed tip to help align the pivot point such that the blade will be cutting along the circle’s tangent. The alignment can be seen below, and the tip is easy enough to see even when a workpiece is being cut on top of the jig.
Utility: So, does it work?
The jig was not a perfect solution, but given the minimum radius of the blade that I normally have on the bandsaw it works great. I typically stick with a 1/2" resawing blade as milling lumber to size is one of the major jobs of my bandsaw. The blade size limits me to 2 1/2" radius circles, so the jig doesn’t need to work with much smaller ones for now. Smaller crafts could be done with another blade, but well, I haven’t even gotten around to the classical bandsaw box projects nor the bandsaw animals seen on some woodworking group pages.
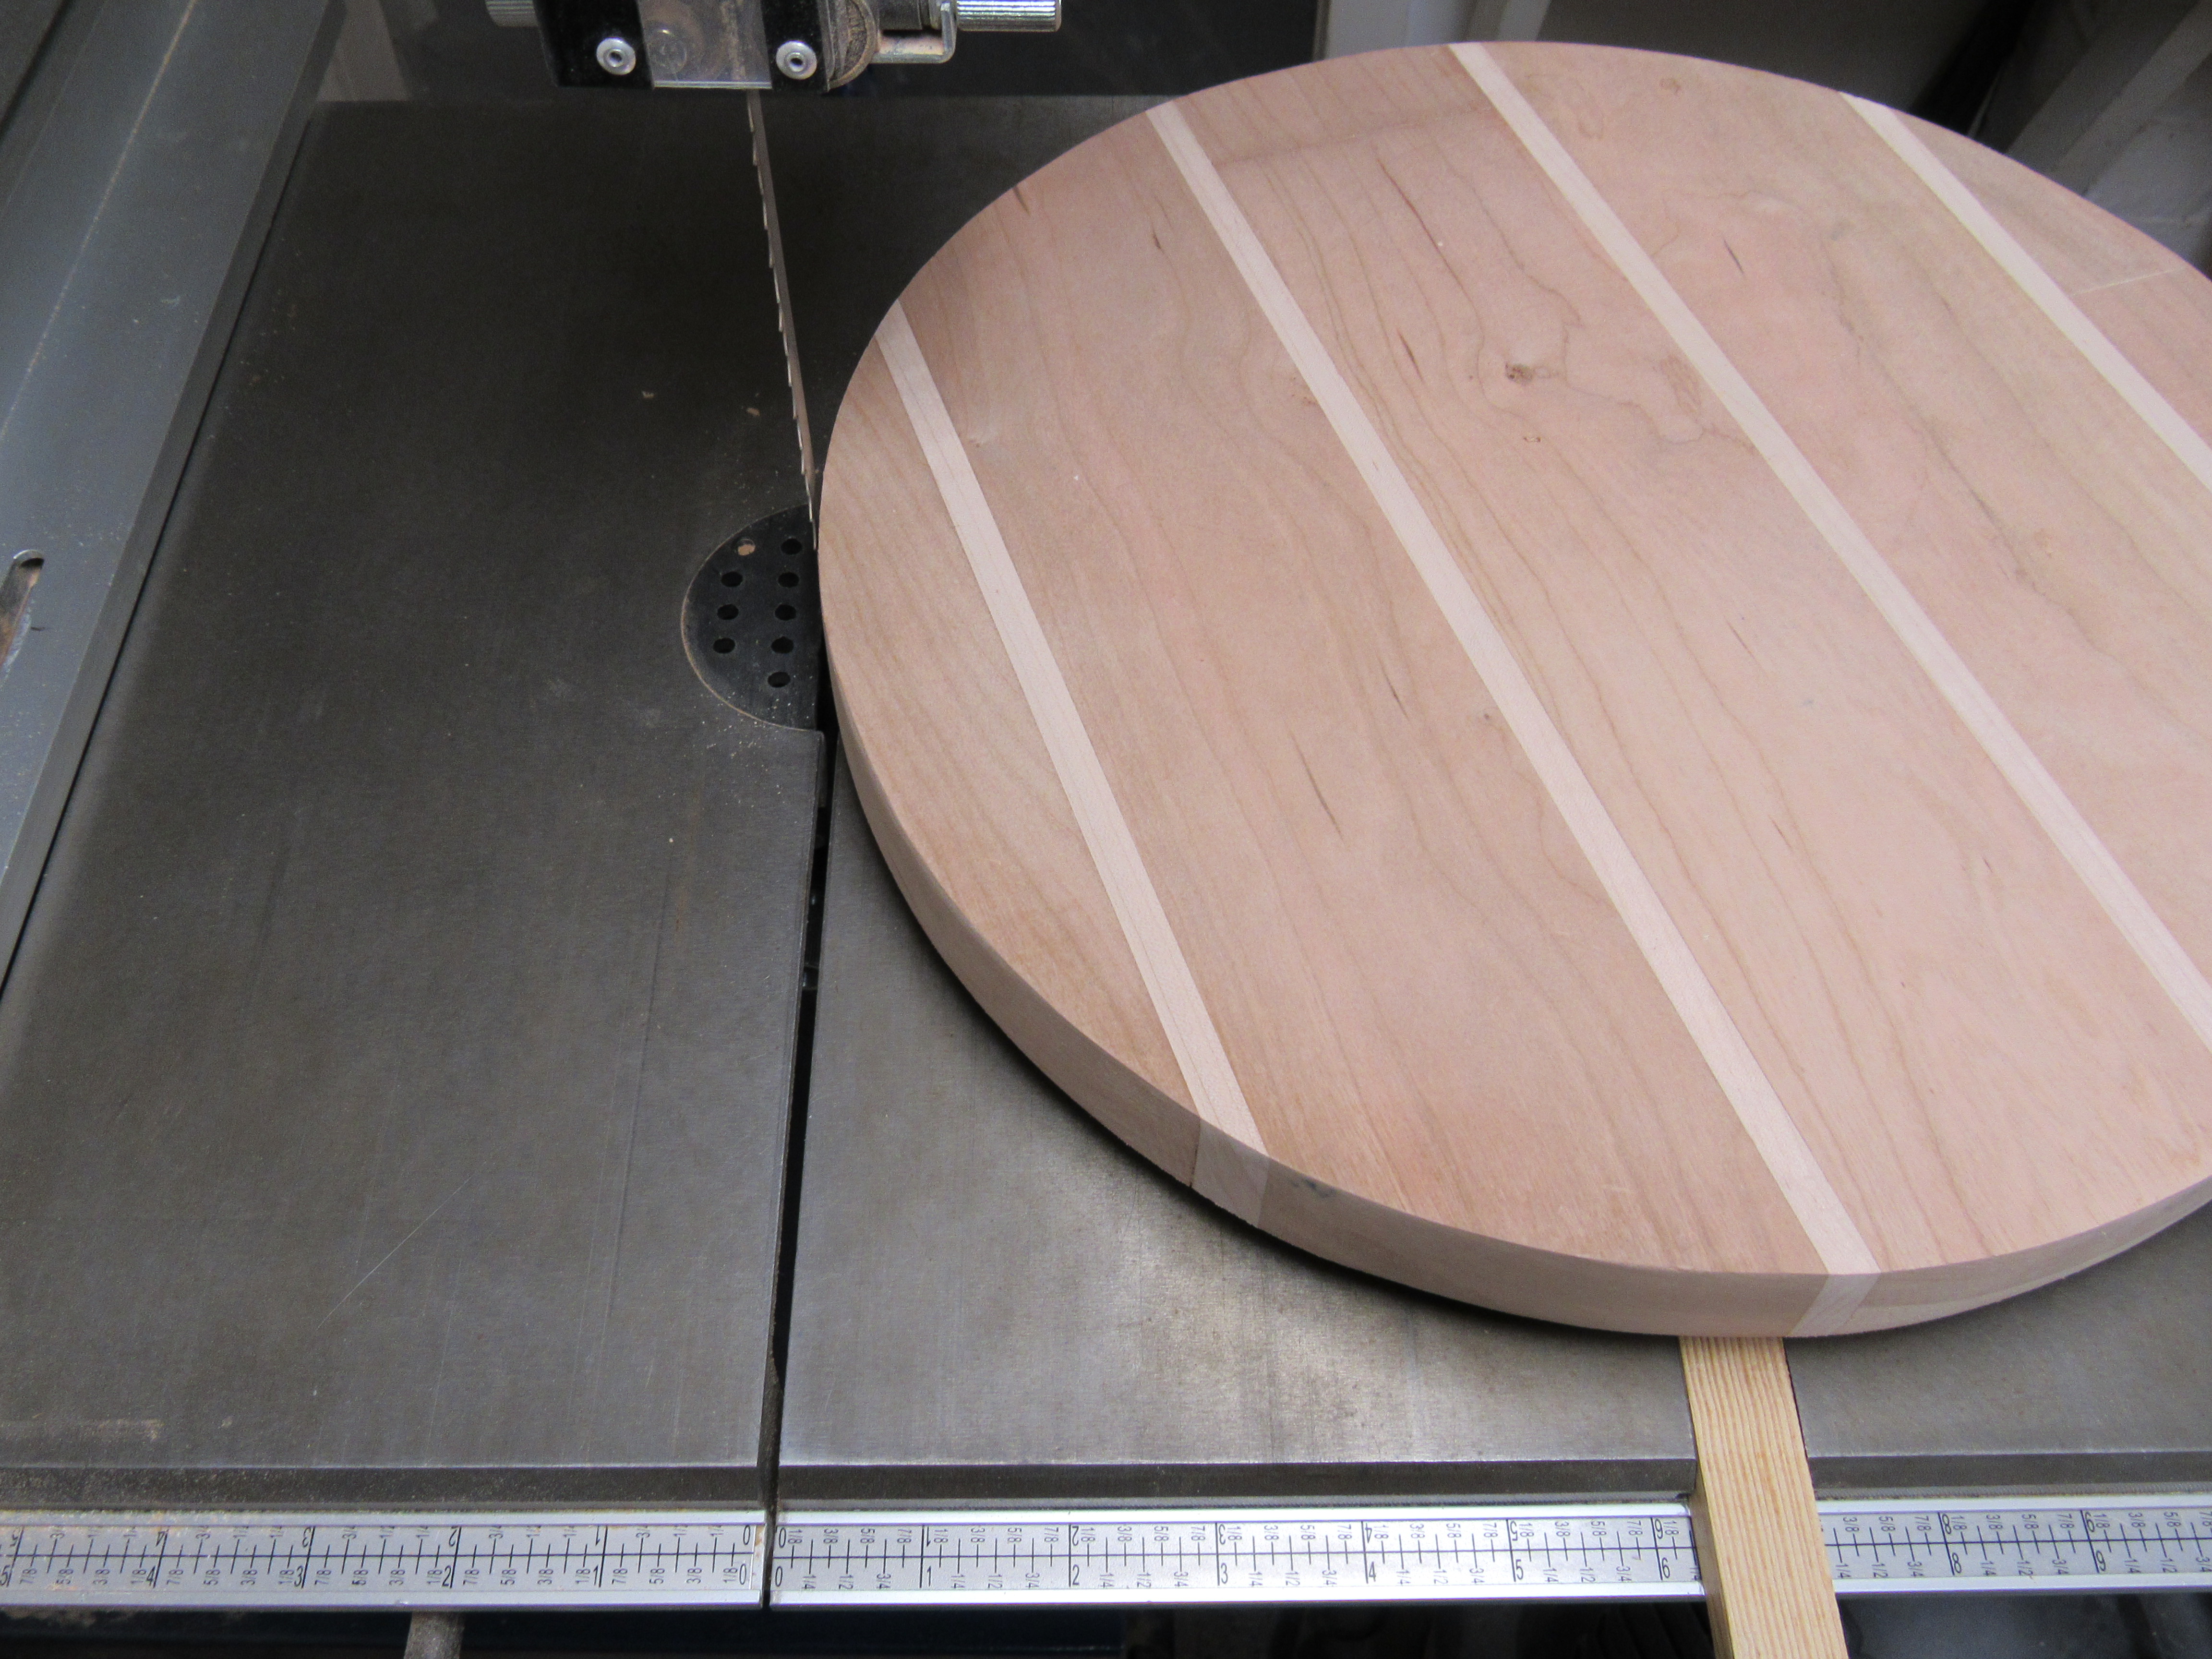
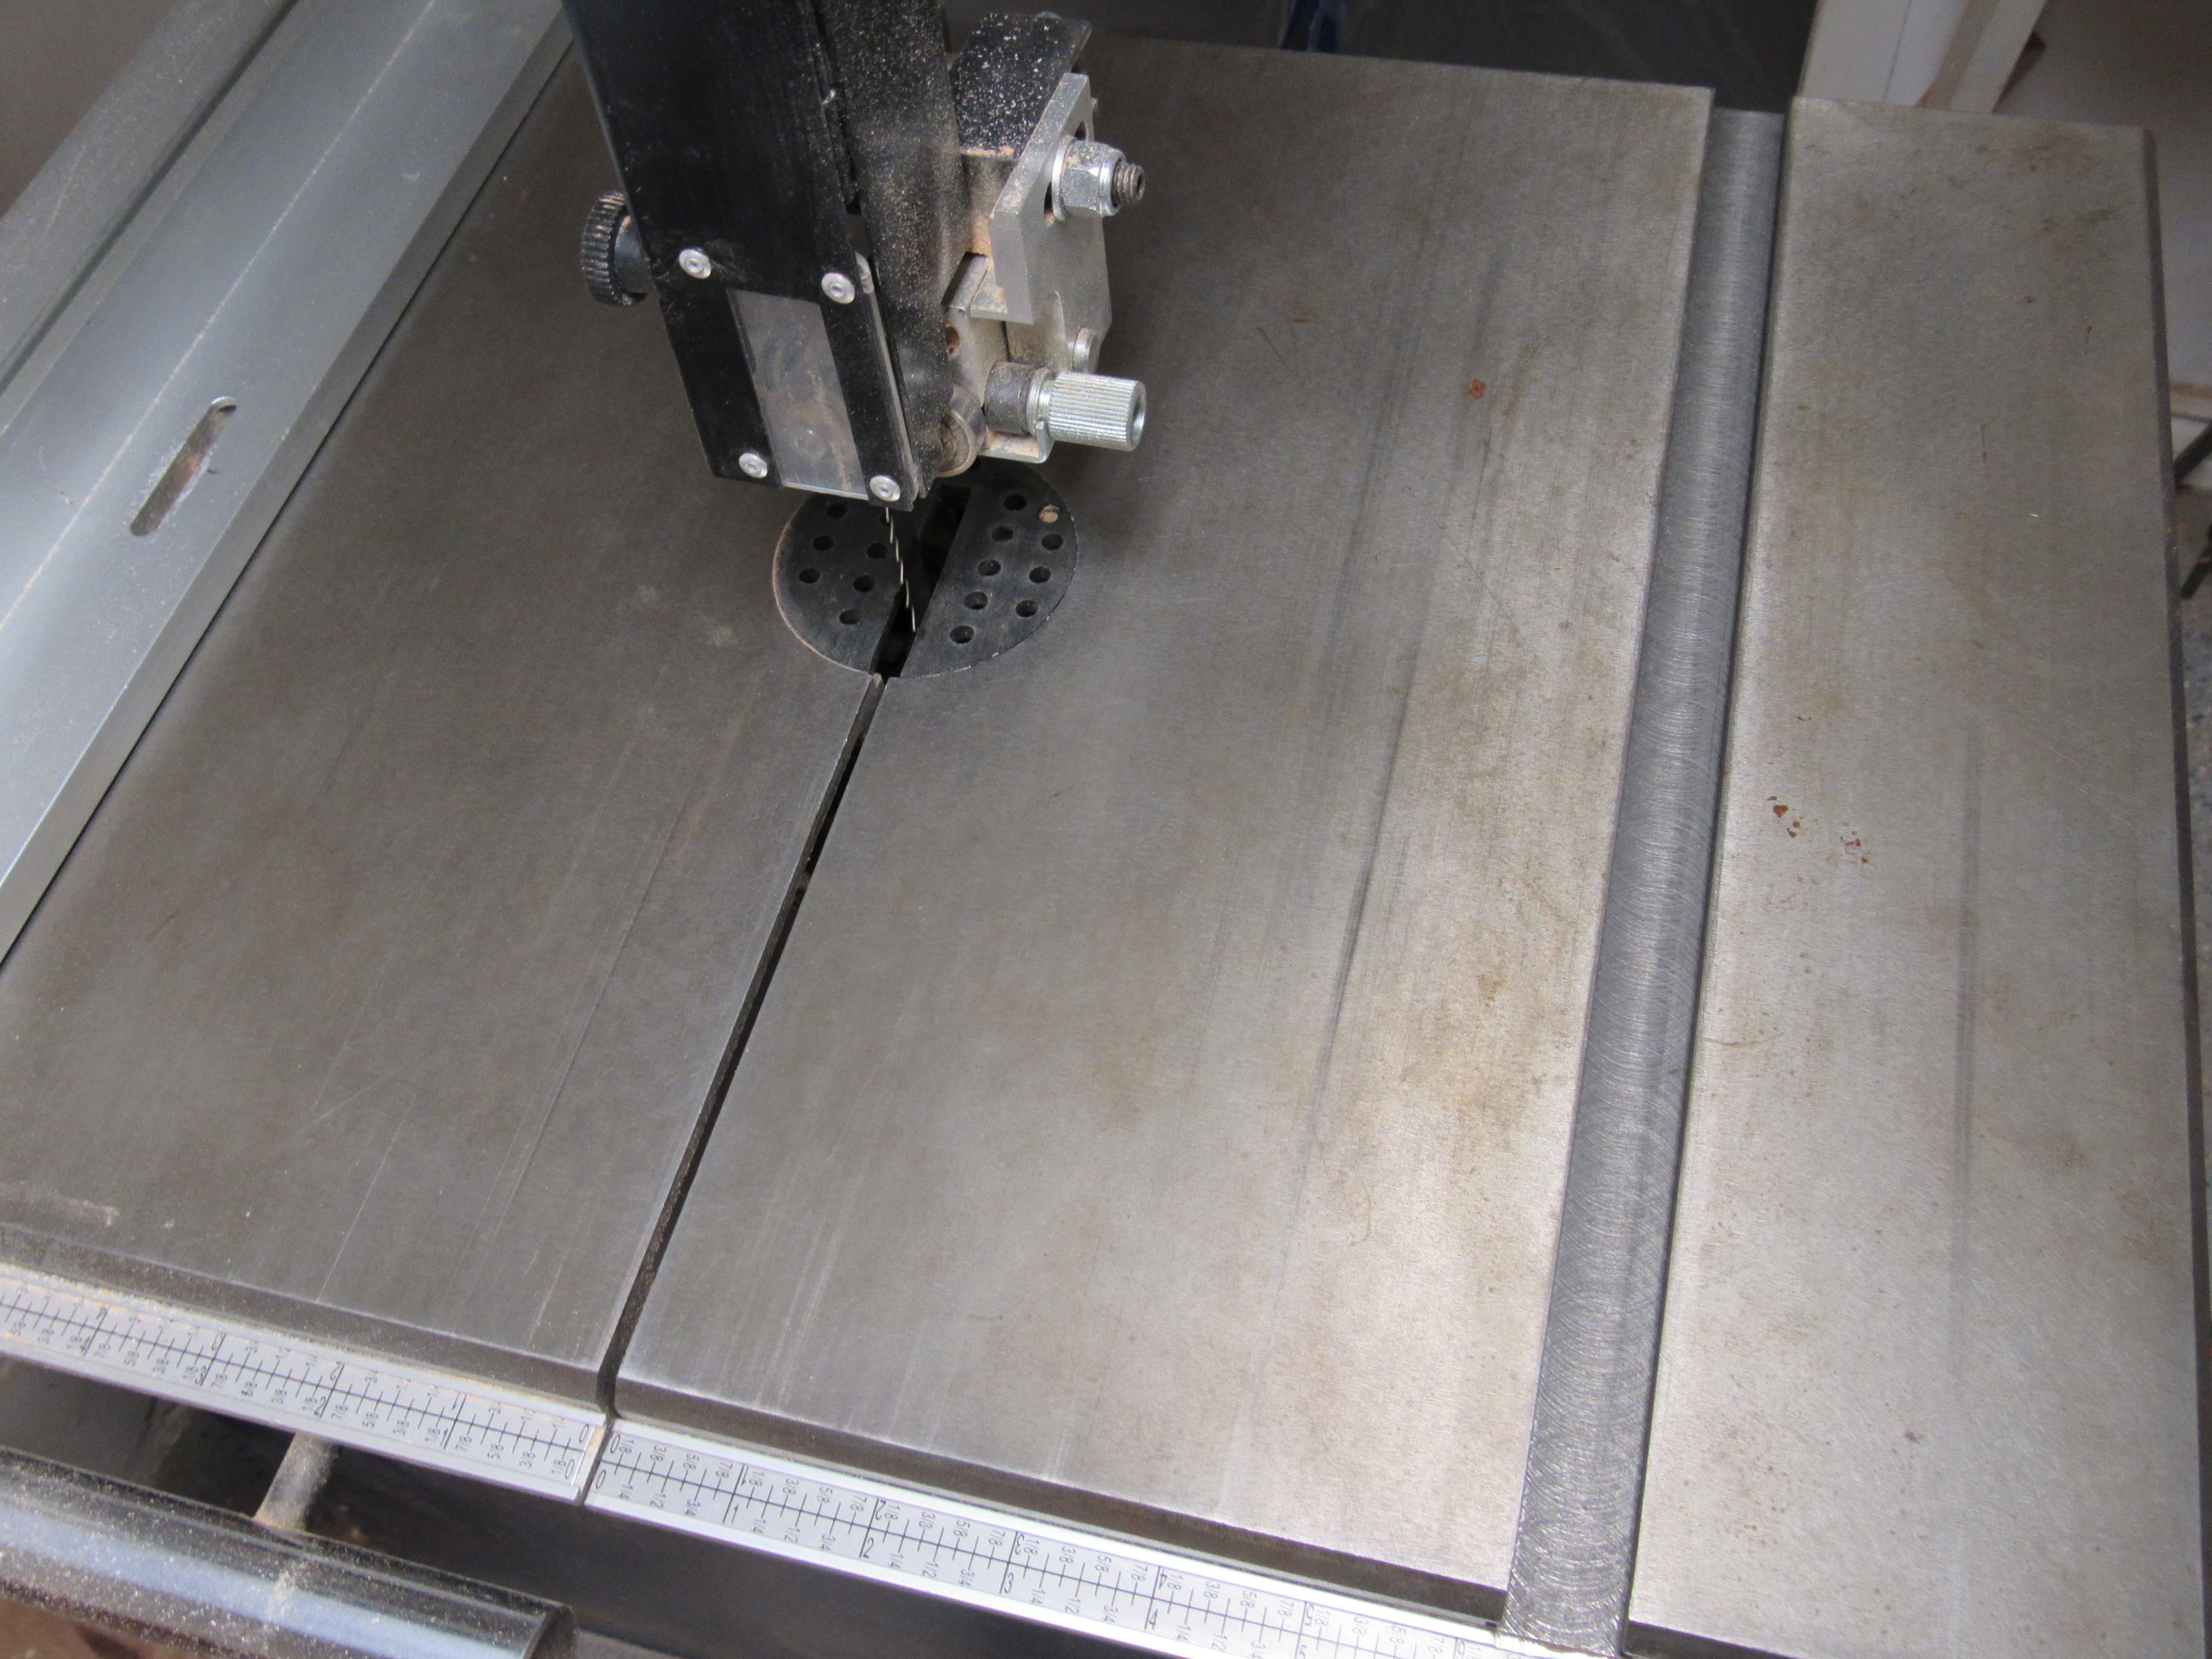
| When cutting I keep the blade guard much closer to the material. The guard is higher in pictures as to not obstruct the workpiece. |
As you can see, it certainly produces circles. The surface finish isn’t perfect, but that’s more of a function of the blade that I’ve chosen to use than the jig itself. Either way the large circles are easy enough to sand.
While I kept the initial table tops relatively simple the jig would also make it possible to cut a bevel on the underside of the circular tops. One pass would be needed to turn the rectangular stock into a cylinder. A second pass could then be done after tilting the bandsaw table and then repeating the process. Of course one could argue that it would be simpler to use a router for such a feature, but it depends on the amount of material getting removed.
Is this something you’d want?
Heh, my guess is likely not, but sometimes projects feel like a metaphorical ``If a tree falls in a forest and no one is around, does it make a sound?'' situation. Documenting what was done and why it was done is a key part of working on projects even if no one goes to replicate it down the road. It adds perspective, provides a chance to reflect on what was done, and helps to streamline the next project along the way. So, the general design likely works and the measurements should serve as a way of getting an idea of the scale of things.
For your own, make sure the material fits your miter slot in both the size of the slot as well as the distance from the bandsaw blade. The slot width/depth should be standardized, but that sort of assumption has bitten me before.
Full FreeCAD files are available, though keep in mind this project has acted as my first hands on less in FreeCAD and more generally CAD in general. I mostly stick to non-computerized methods, but those methods are not great for building long term documentation.